Restoring Reverie

: The Art of Restoring & Sailing a Classic Wooden Sailboat


Leave a comment

Galley Drawers

DSCN0608

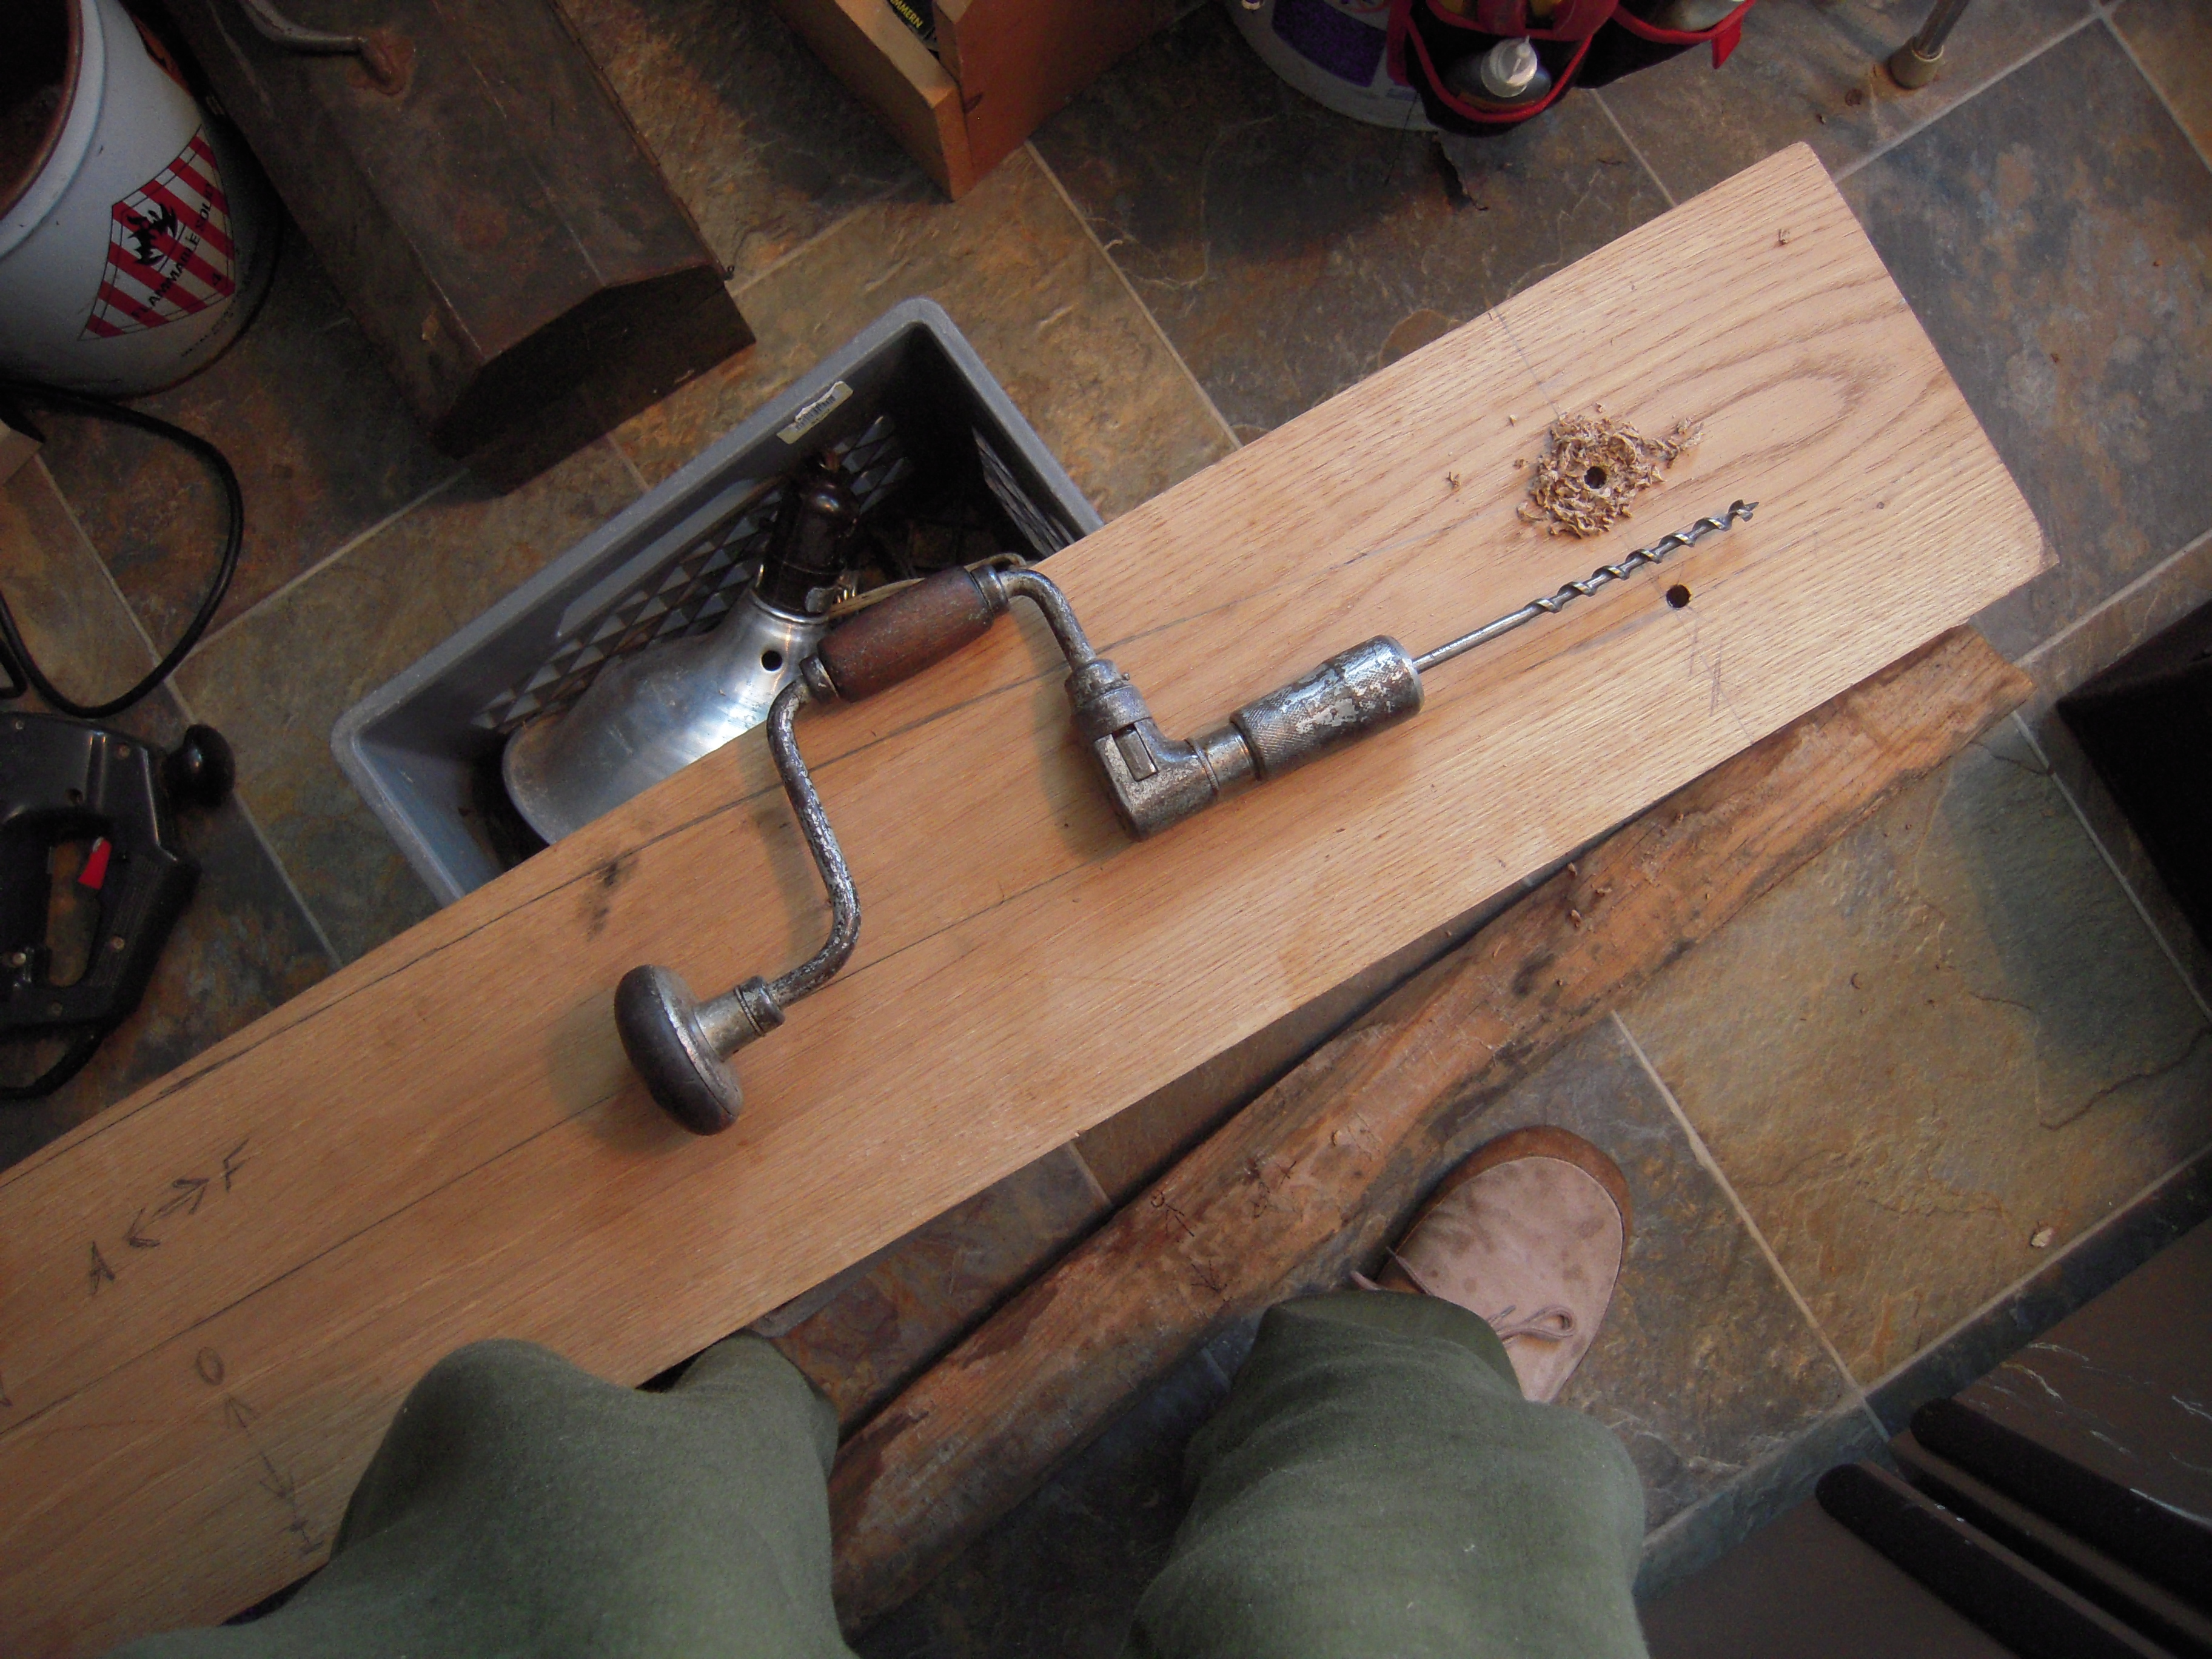
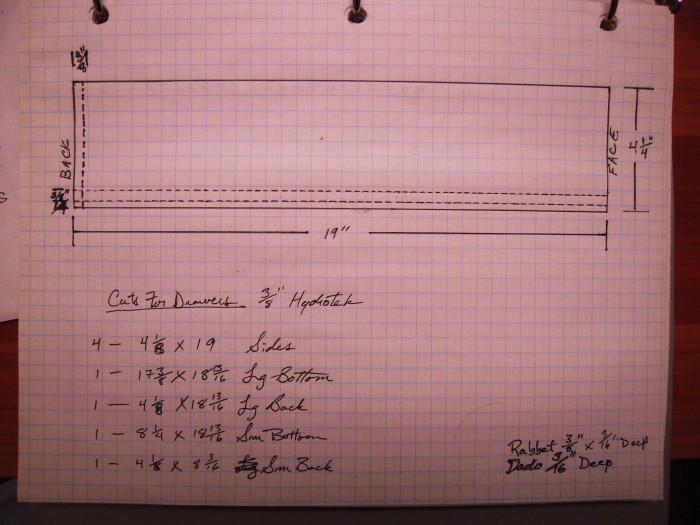
Dimensions for the galley drawers.


Happy Pi Day to all!  As the month of March approaches mid-point, we are seeing some real signs of Spring here in Michigan   We’ve had agreeable, sunny days with temperatures in the balmy 40° Fahrenheit range all week. The snow hasn’t quite melted and we are in the muddy limbo that happens every year.  This morning, we saw a number of Sandhill Cranes croaking overhead.  Their voices have a primal tone much like that of the Loon.  It stirs some kind of gut feeling that has no true explanation.

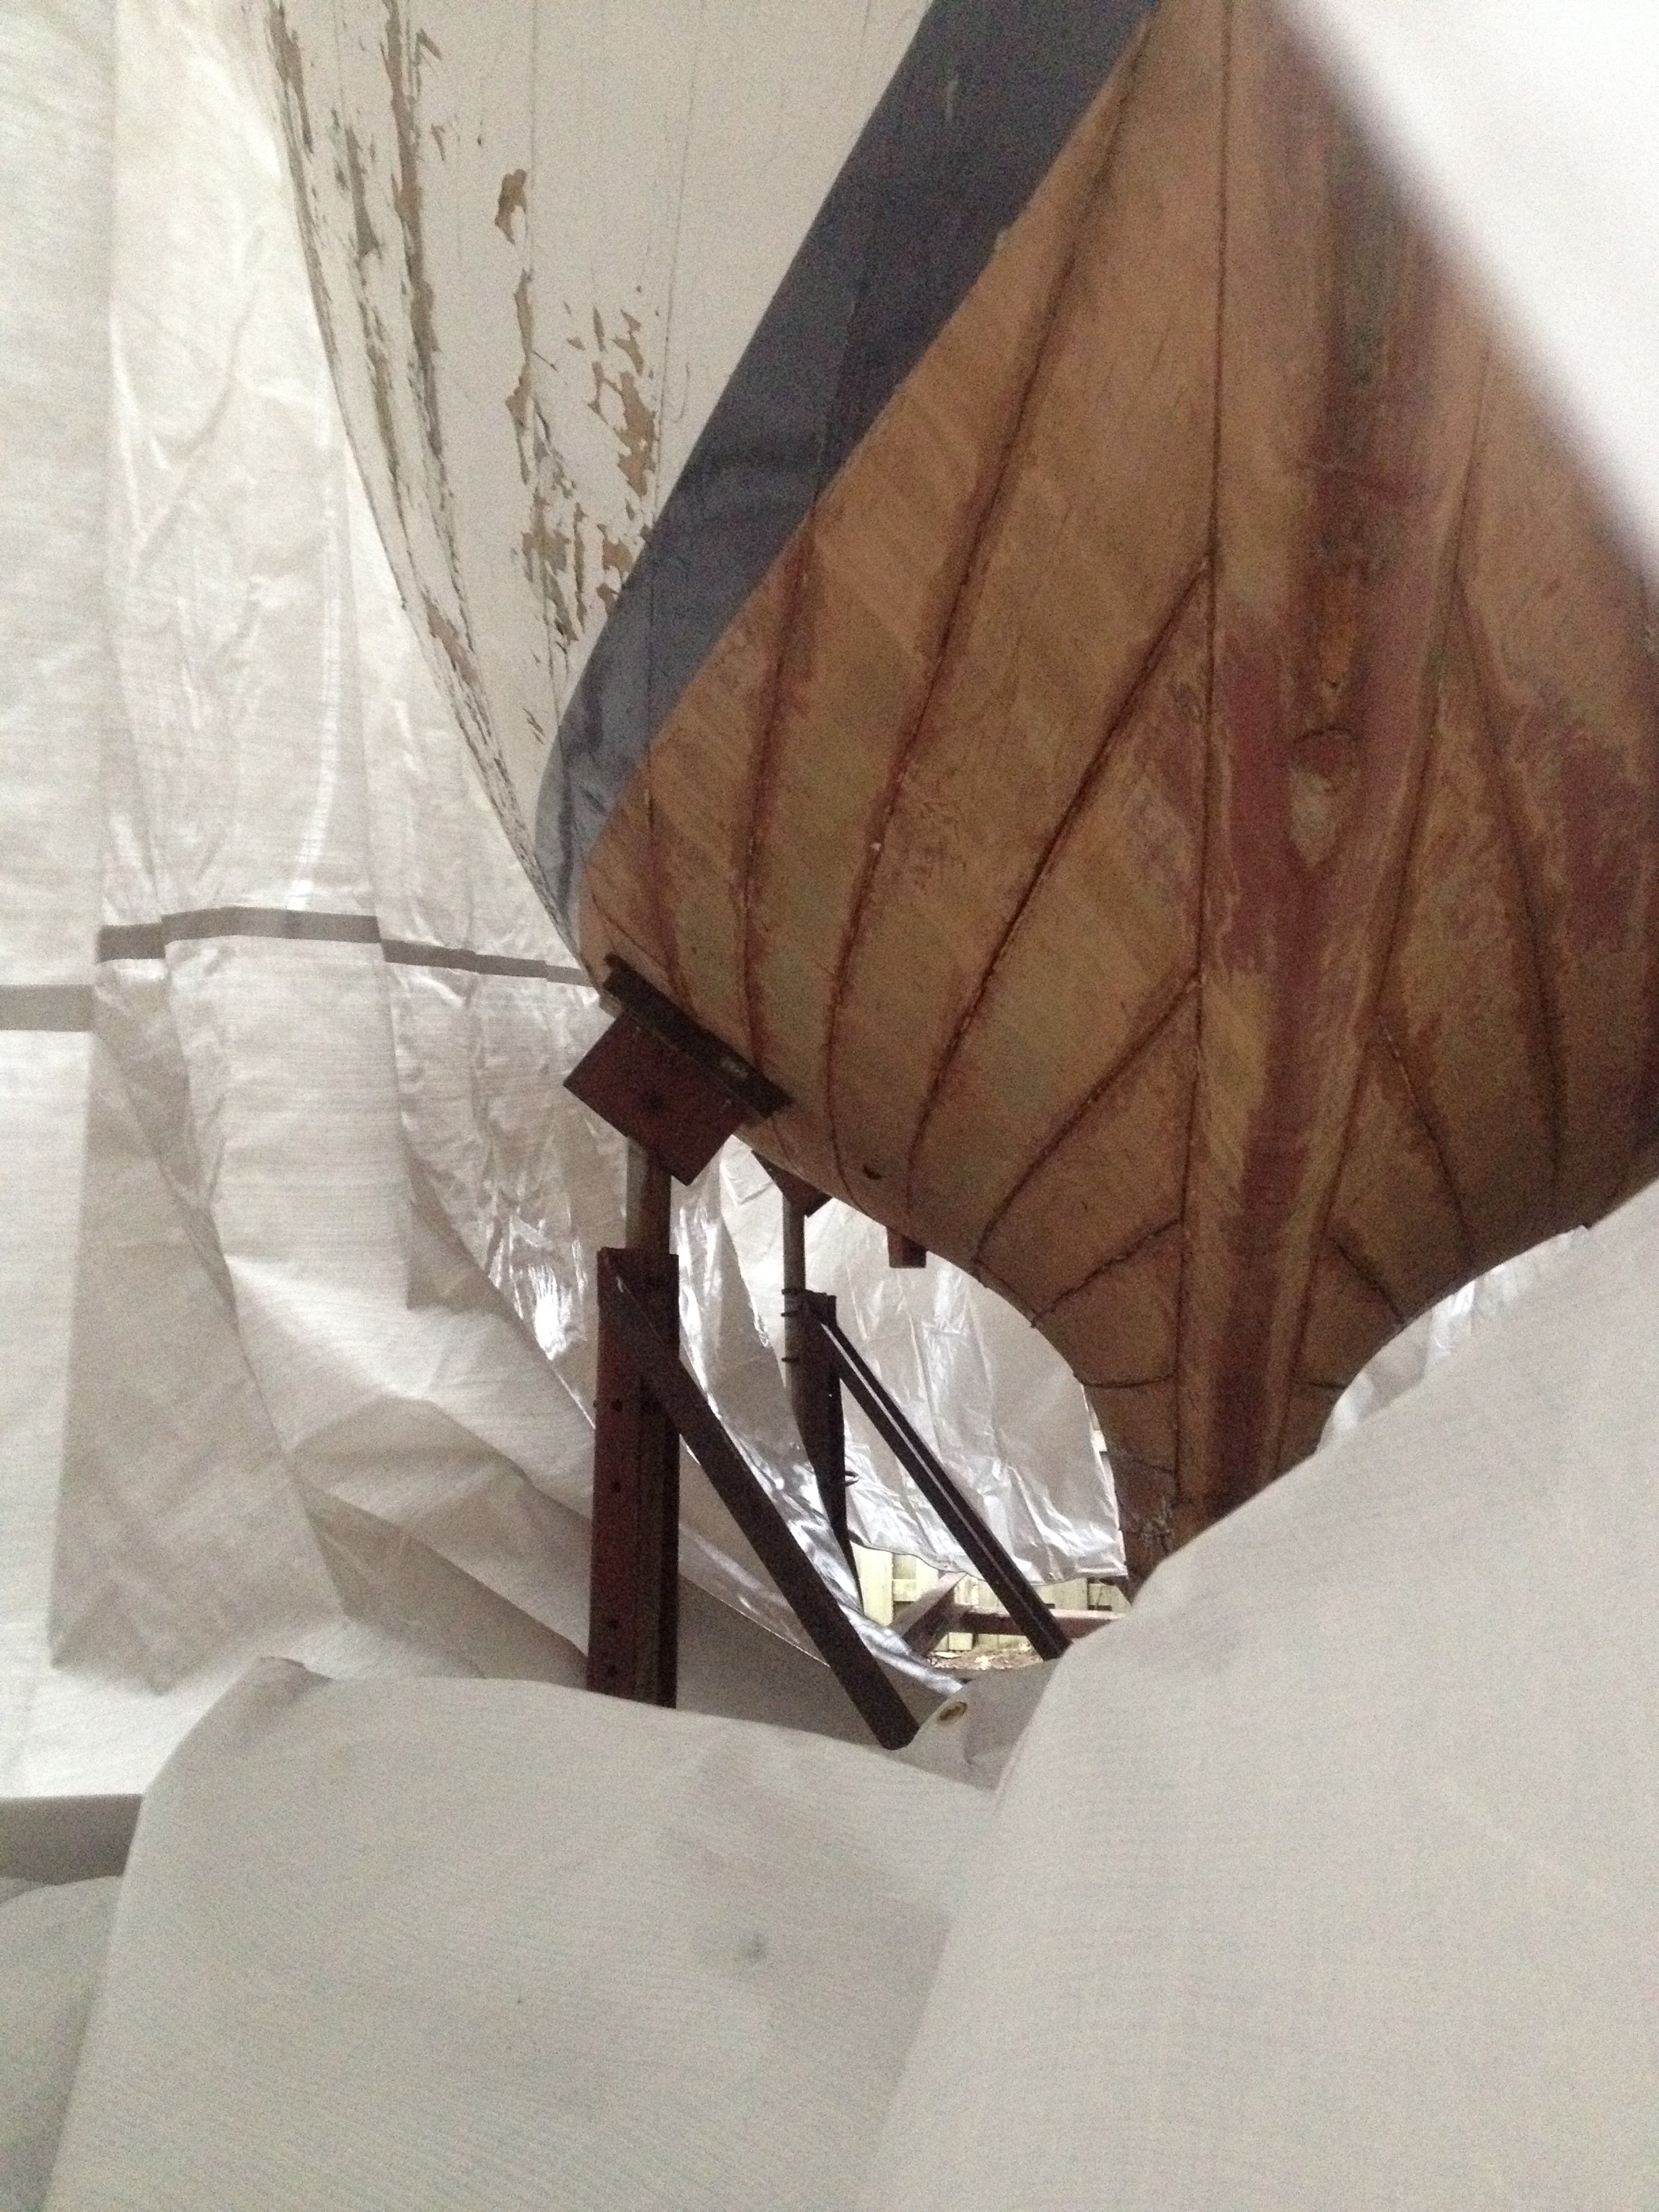
Last Sunday, we drove over to Holland to get the Winter’s snow off Reverie before it became an impossible mess of ice and condensation.  The last time we were there, it was 15° F and I was barely able to get under the heavy mass of snow piled atop Reverie’s tarp.   At the time, I knew we would have to get there at just the right time when things were softening up a bit but before temps were steadily above freezing.

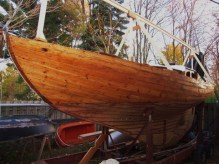
 It took over an hour to get all the snow and ice off the tarp. The snow on deck was knee deep and weighed a considerable amount.  Massive blocks of ice had already formed along the toe rail pinning the tarp taut against the cabin and hatches.  This setup is  temporary and soon, we’ll have a better framework for the tarp so as to be able to work without having to untie the tarp every time; with a 20′ x 30′ tarp, that’s a lot of work.  I pulled the tarp back and we let the deck air out for the rest of the afternoon.  Had Reverie sat without a tarp for another Winter, I’m sure she would have been much worse off.  I know we got to her just in time; before she became nothing more than an assemblage of rotted wood.

The Galley, as we found it.  Looks pretty innocent,eh?

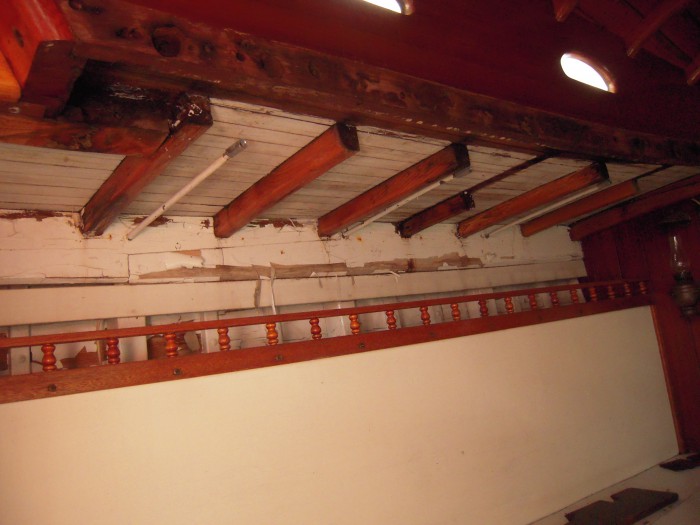
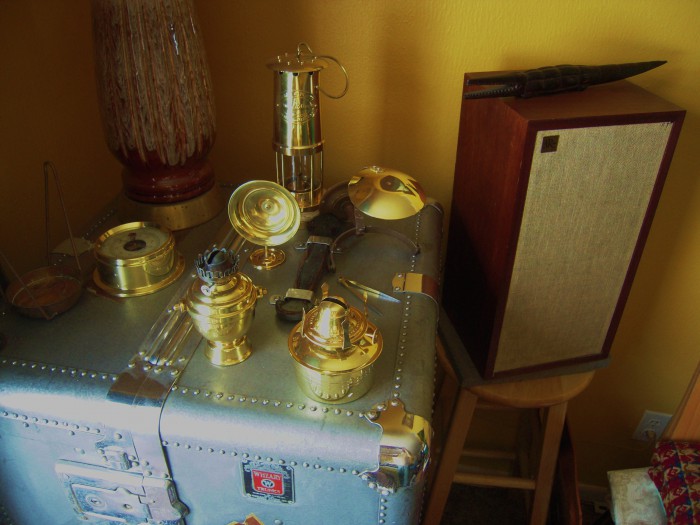
The galley, as we found it. Looks pretty innocent, eh?

The main problem with Reverie is her leaking deck, which started the insidious process that rotted her deck beams and other parts of her interior.  Her cabin-side seams are where a lot of the water entry was occurring; it was there that water leaked down into her galley space and wreaked havoc on the cabinetry.  Water was seeping into the sink/stove area which is the top of the galley space.  In December,  I removed the sink and found the opening completely soaked. In fact, the entire formica covered 3/4″ inch plywood top was completely saturated.

The drawers below had also gotten soaked making them impossible to open.  Luckily, there are two latched doors below them through which I was able to squeeze my arm in and force the damaged  drawers out.  We took them home with us with the intention of yet another off-site project.

Success!

Success!

Ouch

Ouch

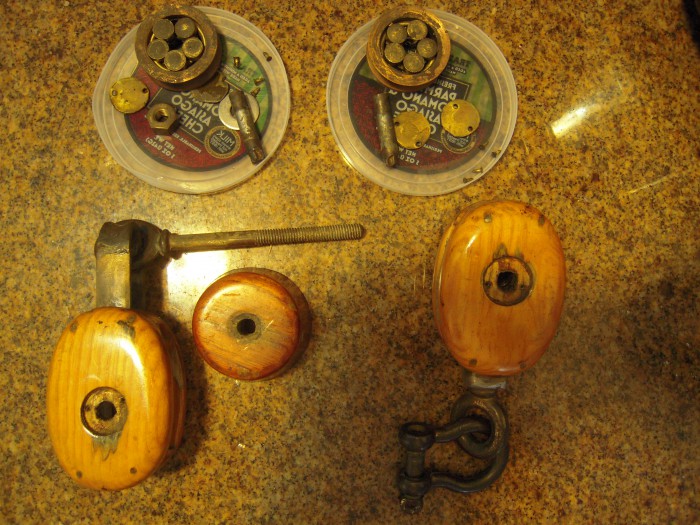
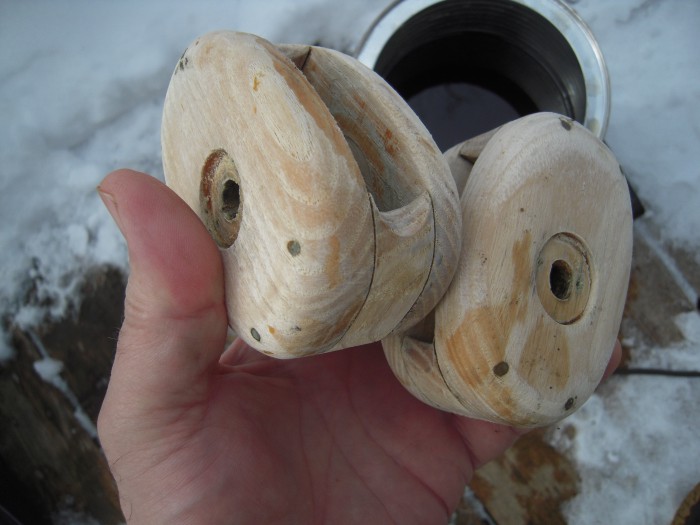
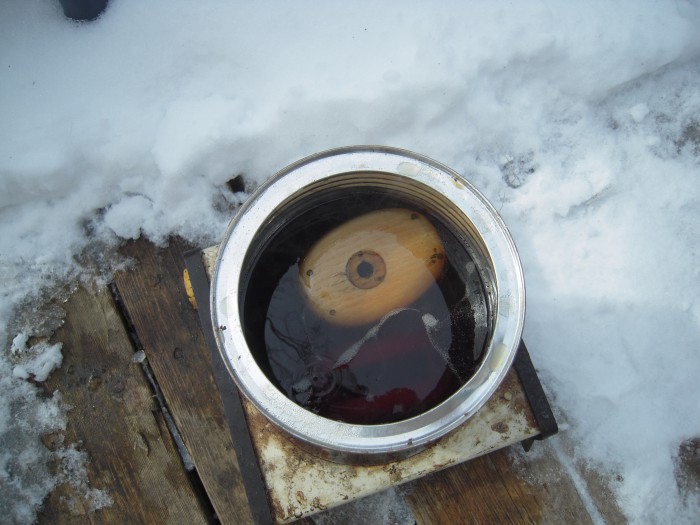
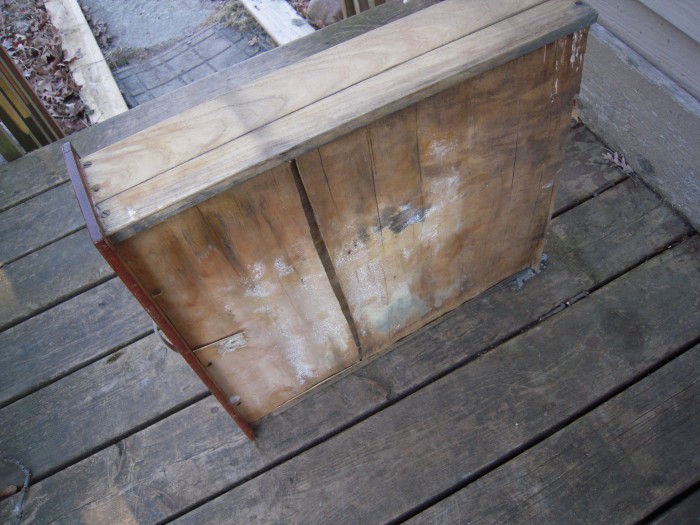
The bottoms of the drawers were made of old school plywood, circa 1953, that didn’t take kindly to having water dripping on them.  The plywood was completely shot.  After taking the drawers apart, I decided to ditch the oak drawer sides in favor of 3/8″ marine plywood that will get sealed with epoxy.  The oak sides looked worse for the wear and were glued up from odd, narrow pieces that would have to be cleaned and  re-glued.  That’s more work than using fresh pieces of modern marine plywood.  The original wooden drawer faces are still serviceable but have splits that will get epoxied when they’re put back together.

Willy Nilly oak sides.  Probably a way of using scrap economically in the production of the boat.

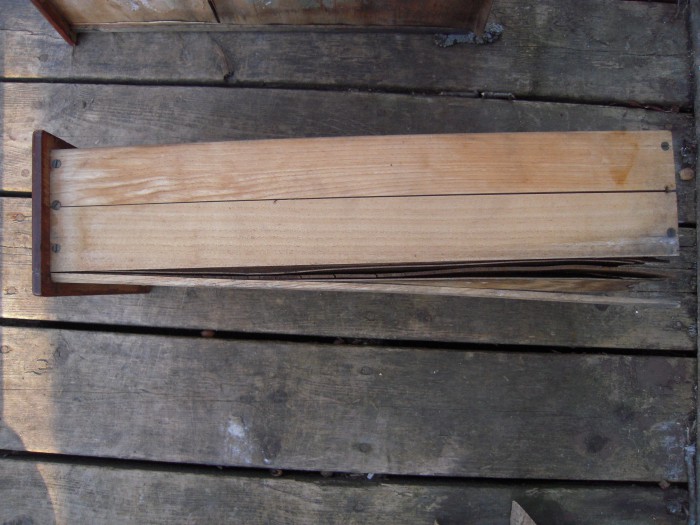
Willy-nilly oak sides. Probably a way of using scrap economically in the production of the boat.

Crap!

Crap

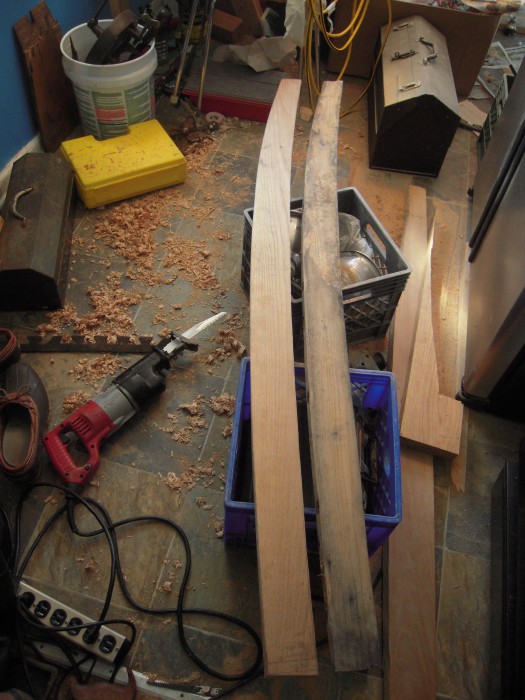
So, I have the materials list all made up and construction method determined.  The entire galley cabinetry is going to have to come out to facilitate a frame repair so, I’m going to cut out the pieces and leave them that way until it all goes back together. If I assembled the drawers, they would be bulky and vulnerable to damage in storage.  For now, they’ll sit in a nice stack, ready to go back together in a moment’s notice.

So, the moral of this story, dear reader is: Never allow your deck leaks get to this point!  The whole mess with Reverie was caused by her leaking decks and would surely have been her undoing.

Stay dry, my friends!

~Roger


2 Comments

Wooden Blocks

March has arrived and the time change to Daylight Savings takes place in the early hours of Sunday morning.  Losing an hour of sleep shouldn’t be much of a problem seeing as I get up well before dawn anyway.  We have passed meteorologic Spring already and the  month brings with it the sense that I need to finish up with this Winter’s off-site projects.

The blocks on Reverie were in desperate need of TLC. The varnish on all of them was chipped and worn with the sheet blocks showing the worst of it.  They had been left on the boat for who knows how long, and had deep splits in the wooden cheeks with black water stains that looked permanent.


DSCN0304

Blocks, their sheaves, bronze roller bearings and cheek plates.


DSCN0046

Some of the blocks as we found them. The lorn sheet blocks are on right.

DSCN0305

Smart Strip does the job.

The first course of action was to disassemble everything and strip the cheeks down to bare wood so they could go into a hot bath of linseed oil, beeswax and turpentine.  I discovered SmartStrip when I was working on Persistence and needed to strip paint from fiberglass.  It is expensive, costing close to $60.00 a gallon but it is environmentally friendly and does the job.  It’s biodegradeable and has very little odor. We have had good results covering whatever needs to be stripped with plastic bags or plastic food wrap and leaving it on overnight.  It will be the stripper of choice for the rest of Reverie’s projects along with a heat gun for the hull and other easily accessible areas.


DSCN0578

A couple of block cheeks stripped and ready to go into the hot linseed oil mixture.

I applied the SmartStrip to  the wooden cheeks and let them sit overnight in plastic grocery bags. The next morning, I scraped off the varnish with a plastic putty knife and an old toothbrush.  I brushed household bleach on the black spots repeating this procedure until the spots were all but gone.  I then scrubbed them under running water so as to remove all traces of paint stripper and bleach.  Before they went into the oil mixture, I let them air dry for several days.

Getting the mixture of linseed oil, beeswax and turpentine at the right temperature takes careful monitoring of the hot plate.  I like to have it as hot as possible without smoking and potentially catching on fire.

DSCN0579

Well used hot plate and coffee can full of linseed oil, beeswax and turpentine.

I cooked each block for about 4 hours until I could see no more air bubbles coming out of the wood.  I then let them sit for a while on a piece of cardboard and really didn’t have to wipe any excess off except where they touched the cardboard.  I use boiled linseed oil, a bit of beeswax and  turpentine to help the mixture penetrate deep into the wood.  Boiled linseed oil dries faster than raw linseed oil but still, these cheeks are going to hang for a few months before I lightly sand them and finish them with spar varnish. The splits in the sheet block cheeks completely closed up after their soaking and one has to look hard to see them.  They’ll be fine.

So, that’s one more project off the list and a million more to go.  Regardless, it feels good to know it’s done and I don’t have to think about it any more.  That calls for a wee dram of Scotch!

Cheers,

Roger


2 Comments

Port-side Carline

DSCN0259

Old Man Winter is really giving it to us this week with daytime temps in the single digits and nighttime temps below zero. On our back road morning commute, the other day, the thermometer read -20 F.  We have now been monitoring that area of our commute and have been finding there’s this little stretch of micro climate where the temperature is usually a few degrees cooler than elsewhere.  Hmm…

I’m committed to splitting up a giant red oak for firewood tomorrow but we’ll have to see if the machine will start in this kind of weather.   The forecast calls for -17 F night tonight so, dreaming of boats is a good way to pass the time.  As cold and snowy as it is outside, I still have some off-site projects to accomplish.

One of the off-site projects I am pleased to have gotten done is cutting out the port-side cabin carline to replace the damaged rotting one.


Port-side carline removed with rotting deck beams

On wooden boats, carlines are fore and aft deck supports that frame openings, such as hatches and the coach roof of the cabin, that run parallel to the keel.  This carline had already been removed when we got the boat. Luckily, it was intact so I had a nice template for the new one to replace it.  White Oak is the wood used for the deck beams and carlines of Reverie.    A band saw would have been very handy to cut out this piece as the carline is about 5-1/2 feet long.  That means 11 feet of sawing through 1-1/2 inch white oak.   Not having a band saw at my immediate disposal didn’t deter me from getting this done.


Pilot holes for the cut.

Pilot holes for the cut.


I first tried using a saber saw thinking it would be a good tool to keep the blade perpendicular to the mark and, ultimately, less work shaping the carline to its final dimensions. I made it less than a foot before the saber saw blade yielded to the mighty white oak and snapped.  Had I been successful with that laborious method, it would have taken me forever to cut that eleven feet.

It was time for bigger guns and a bit more concentration.  I chose to go at it again with a Sawzall and the largest blade aptly named ‘The Ax’ .  This is a big blade made for demolition work and capable of cutting through not only wood but stray nails and the like; perfect for hard white oak.  That said, I started with a fresh blade and noticed it wasn’t cutting as well by the time I finished.


Sawzall with 'Axe' blade

Sawzall with ‘Ax’ blade

Concentration was key at this phase.  I wanted to keep the cut 1/8″ from the template lines so as not to spend an inordinate amount of time shaping the piece later.  It wasn’t fast but the cut went well and I was glad to have gotten that close when I finished shaping the outer curve of the carline with a draw knife and hand planes.


DSCN0488

Stanley Rabbet Plane set to bullnose position.

DSCN0489

Draw knife used bevel side up for convex cuts and bevel side down for concave cuts.

The draw knife was used to bring the piece evenly close to the final mark.  The rabbet plane set in the bull nose position worked admirably for the concave planing as did the wooden jack plane for the convex planing.  As I worked, I checked for square often. It varied by no more than a 32nd” off square. I marked those areas with a pencil so as not to plane the rest of the edge out of square.

Keeping the Sawzall visually perpendicular to the piece takes a bit of practice and I would recommend cutting 1/4″ or slightly more away from the template mark if you’re not confident in your sighting ability.  It might take a bit more time in the final shaping but it’s better than ruining a big, expensive chunk of oak.

DSCN0487

16″ Wooden Jack Plane

The wooden jack plane is one of my favorite tools.  I stuck the removable handle back on it for the photo but I use it without.  I find I have a lot more control with both hands cupping the body.   It has somehow survived these 100 plus years and gives me great joy when I use it.  It looks crude and simple compared to more modern steel body planes but its razor sharp, heavy blade doesn’t chatter and provides lovely curls of fragrant wood as it glides its way through a project.  It literally sings with sonorous notes that tell you it is perfectly adjusted.  I made our Arts and Crafts inspired oak and walnut bed relying heavily on this plane and I can still hear the notes as I planed away. It planes so smoothly, I’ve never bothered to sand or take a cabinet scraper to the bed. The old jack plane comes alive and the resonance in the wood is sheer delight to experience. It did sing a couple of times when I was working on the carline but it was quick work and I never really got it going.   It is a privilege to own and I hope it provides some other lucky woodworker(s) the joy is has for me when I am dead and gone.

Out with the old, in with the new.

Out with the old, in with the new.


Once the piece was square and within 1/16 ” to the template mark, I stopped and will do the last few passes when I’m back at the boat. When you shape a piece of wood like this, you are releasing it from its former state and it now has a definite purpose.  The carline was always there, latent in that slab of oak.  I feel that I did nothing more than free it to a higher purpose.  After all, it could very well have been cut into 16″ sections and split up into firewood to warm some chilly soul on this frigid Winter day.

Stay warm, my friends.

~Roger


Leave a comment

Falling Snow and Polished Brass

FALLING SNOW

The Winter of 2014/15 has been a strange one for us here in Southeast Lower Michigan.  The month of November delivered bitter cold and record lake effect snow events along the windward shores of the Great Lakes.  Lake Effect snow occurs when extremely cold air moves across the unfrozen Great Lakes. The moisture from the relatively warm lake is drawn into the frigid air creating snow that falls in bands when it hits the next land mass.  The prevailing winds for this to occur are generally from the N, NNW and W.

December and January vacillated between exceptionally warmer temps and exceptionally frigid spells of Alberta Clippers and Polar Vortexes. There was little snow which made for lousy cross country skiing in our neck of the woods.  After last years record snowfall, this Winter has been anticlimactic.  The previous Winter was a once in a lifetime experience that allowed us to ski daily in near perfect conditions right in our own backyard.

Then, February arrived and let us know it was not messing around.  12 to 17 inches of snow fell across the entire lower portion of Michigan with most of the Midwest seeing significant amounts in that 24 hr period. It started in the wee hours of February 1 and ended the morning of the 2nd. The pendulum swung and we were in the grips of powerful Arctic air.  Single digit Fahrenheit temperatures are not conducive to boat work but this is a huge project and progress must be made.


DSCN0255

Post February 1-2nd snowstorm. It took us several hours to clear our driveway and pathways.


It was during one of those warmer spells (slightly above freezing) in early December when we went to take a look at this wooden sailboat, Reverie, stoically losing it’s battle with time.  We are taking a Panglossian view of this Winter as it seems better for laying the foundations for the restoration of Reverie than it is for cross country skiing. Our ‘best of all possible worlds’ has provided corridors of time and windows of opportunity allowing us to get things done.  To date, we have over 90 hours of labor invested in Reverie.  That doesn’t count travel time to and from the boat. We’ve made the best use of this down time and have accomplished what we could.  The boat is in Holland, Michigan, a 2-1/2 hr drive from our home in Southeastern Michigan so any off site work that can be done is crucial to a timely restoration.

POLISHING BRASS

On one of our visits to the boat, we removed the brass lamps, the ship’s bell and the original Airguide barometer and clock. Everything was badly in need of some elbow grease.  I ripped up an old bed sheet into 1 foot squares and got cracking.

Perko Lamp

Perko Lamp: The Perko needs a new burner as the tabs have broken off, so I’m keeping my ear to the eBay door & scanning thrift shops for a replacements. It needs a P&A Hornet burner.

.


Nice old lamp that reads, "English Made 3/4" wick" on the burner.

Nice old lamp that reads, “English Made 3/4″ wick” on the burner.

Airguide Barometer

Airguide Barometer

Airguide Clock with German movement.

Airguide Clock before cleaning

The Airguide clock is pretty neat.  It cleaned up really well.  It has a German movement that operates on a C battery and  allows exact time adjustment.  I’ve got it set to within a few seconds error a day and am slowly tweaking it to exact time.

DSCN0257

Everything polished up quite nicely and after 50 plus hours of polishing, we have this. Julia picked up a bottle of Wright’s Brass Polish and I was excited to give it a try.  Over the years, I’ve tried many brands of polish and wasn’t terribly impressed by some of the brands that claim to be “the best”.  Wright’s works the best, hands down. It doesn’t require a lot of pressure to work.  With other polishes, I would have to stop after a few hours because my fingers were getting sore from applying pressure.  With Wright’s it is a good idea to let the polish sit on the metal for a short time before beginning to polish to allow the chemical reaction to start.  Speaking of chemical reactions, it was easy on my hands and washed off very easily with water.


I was very happy to get this tedious chore out of the way during the Winter.  It’s one of those things I “don’t have time for” during the warmer months when one’s time is better spent outdoors.   The only other time I might feel like doing this is while cruising . You’re on the boat anyway and there’s only so much napping and reading to do in the off-watch time. Hours and hours of polishing is not a bad way to go.

These lamps had a coating of grunge on them as well so they were especially nasty to clean.  I find that polishing brass is rather cathartic and the results are amazing.  Once polished, these old relics became wonderful works of art that would be hard to distinguish from new if it weren’t for the various dents that come with years of use.  The real trick with brass is to maintain it.  You have to keep up on it and not let any deep dark spots develop.     I don’t expect the next round of polishing to take nearly as long.

 “A rub in time saves nine”?

Cheers,

Roger


2 Comments

Under wraps while the snow flies.

photo (1)