Restoring Reverie

: The Art of Restoring & Sailing a Classic Wooden Sailboat


2 Comments

What’s Done Is Done

“To come to the end of a time of anxiety and fear!  To feel the cloud that hung over us lift and disperse- the cloud that dulled the heart and made happiness no more than a memory!  This at least is one joy that must have been known by almost every living creature.”

-Richard Adams, Watership Down


Last night, a task was put to rest that has plagued the restoration project for some time.  Last night, as twilight fell, I wrestled the 20 x 30 ft tarp over it’s frame and  drove away knowing I was done stripping, sanding and oiling the entire topsides of the good ship, Reverie.  A November Gale was kicking into high gear on the entire Upper Great Lakes with our Lake Michigan seeing 50 mph gusts before midnight.  It had begun to spit and gust earlier in the day but I had to finish leveling and blocking the trailer before another Winter set in.  With Reverie buttoned up for the storm, level and covered, I felt like I finally had some good news to share.

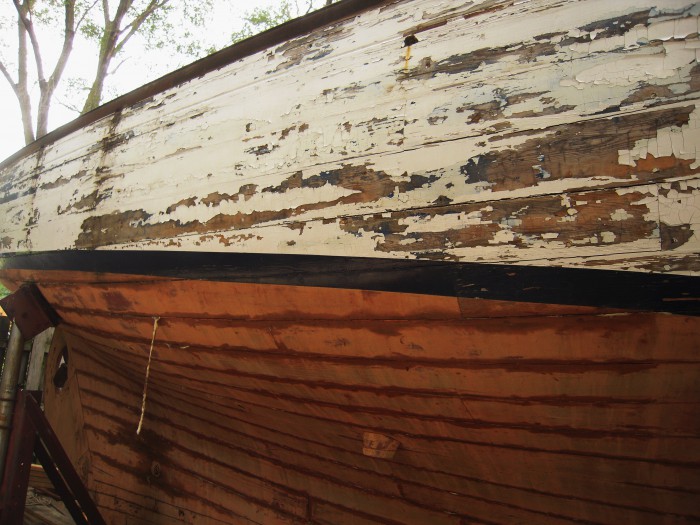
The stripping, sanding and oiling of the topsides is now complete.  I started the port-side last year and finished about this time last November, thinking I would be able to get the starboard-side done in the Spring and move along.  I jumped into it last April with renewed enthusiasm and resolve to finish this most unpleasant task.  What was it about this task, this minor detail (on paper), that made me want to do anything and everything but what needed to be done?

There was, first and foremost, the mess.  Everything about the job involved a mess.  Large piles of scraped paint and toxic sawdust required constant vigilance and tidiness. In April I got about six feet working on the starboard side from the bow back.  Last Summer, we were in the grips of one of the most humid summers I can remember.  Wearing coveralls, gloves, hat, goggles and respirator was like some form of Medieval  torture .  Eventually, I  succumbed to heat exhaustion and decided to put the project on hold.

While the planning went on, the actual work on Reverie came to a quiet halt, for the summer.  Instead, we got out on the water and had some sailing days aboard our little Com-Pac 16, Prudence; 85° F with 85-90% humidity is bearable when you are 10 miles offshore.  We sailed and sailed until the weeds clogged our boat launch to the point of us almost getting stuck in invasive Eurasian Watermilfoil.  Keels and milfoil don’t mix.

Click to access Eurasian_Watermilfoil_521353_7.pdf

img_20160818_154420832

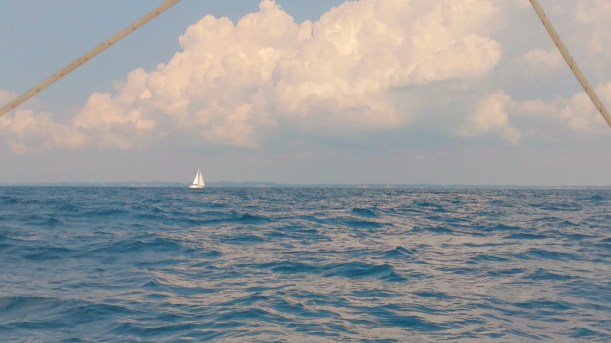
Just one of the brilliant days on Lake Michigan

img_20160826_163420703_hdr

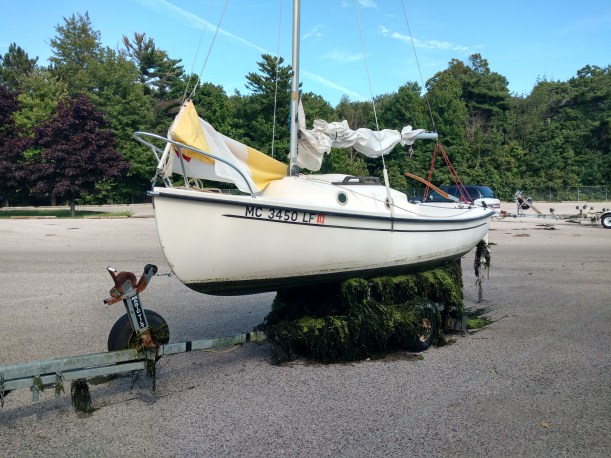
Invasive plants at Port Sheldon

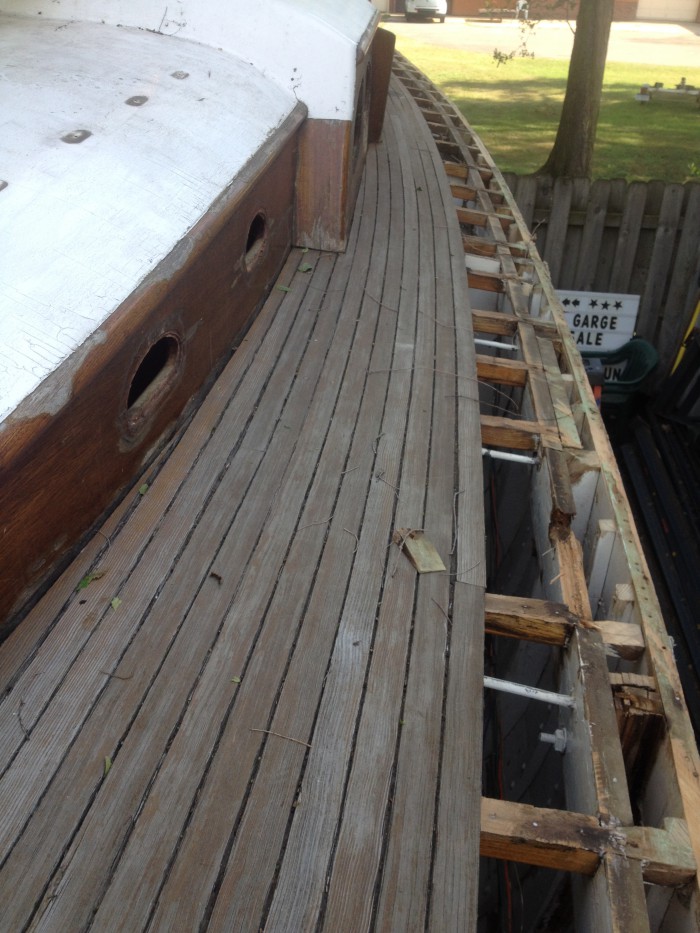
By the time the weed situation shut down our sailing, we made time to get a thing or two done aboard Reverie.  Julia started removing the rest of the interior cabinetry while I did various odd jobs that needed to be done sooner than later.  She eventually removed enough of the galley to expose the engine which made it easier to get it ready for removal.

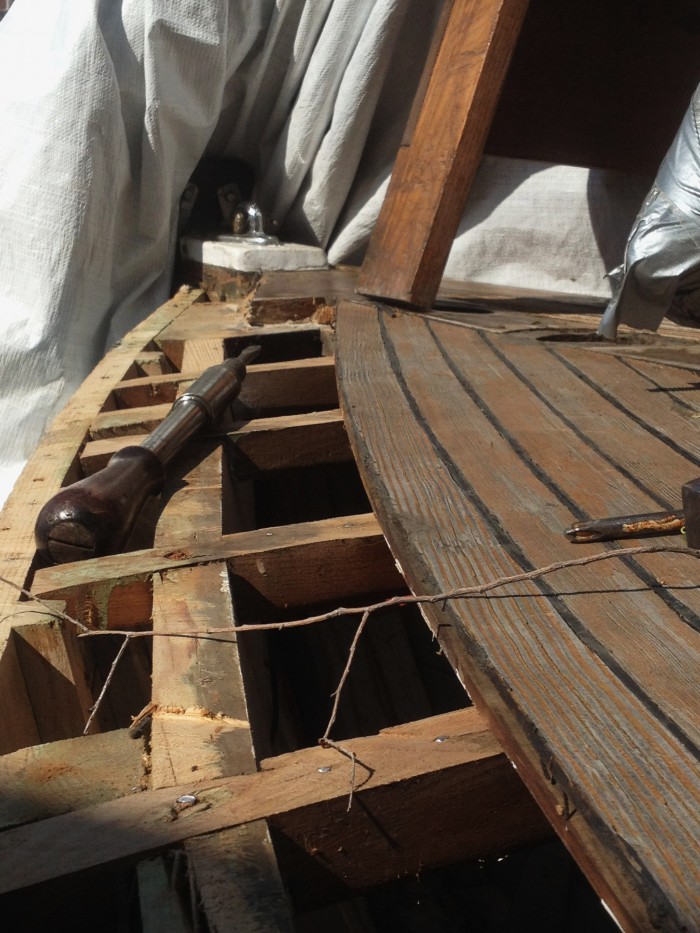
I ended up getting the last of the interior out with a hammer and pry bar, preserving only what would go back on board.  A lot of the wood had experienced some effect of leaking rainwater and had to be taken out of the equation.  We put everything into storage to be used as templates, if needed. The interior is so much easier to assess with all of the cabinetry removed.

img_20161021_161047130_hdr

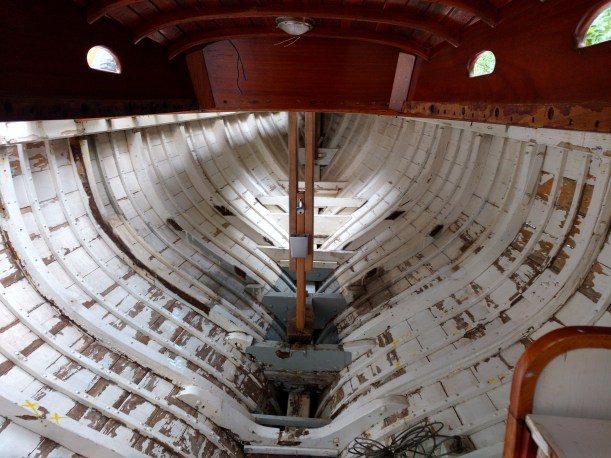
Reverie. happy to have all the rotting wood removed

By the time all this work was done, the weather had cooled down enough for me to buck up and get back to the scraping.  On a relatively large project, such as this,  it is a good idea to stick to tasks as distractions lurk at every turn.  Look, a bird!  Checking something off the list allows the mind to be released from further thought on the subject and proceed toward the end.  There’s a lot of that to come.

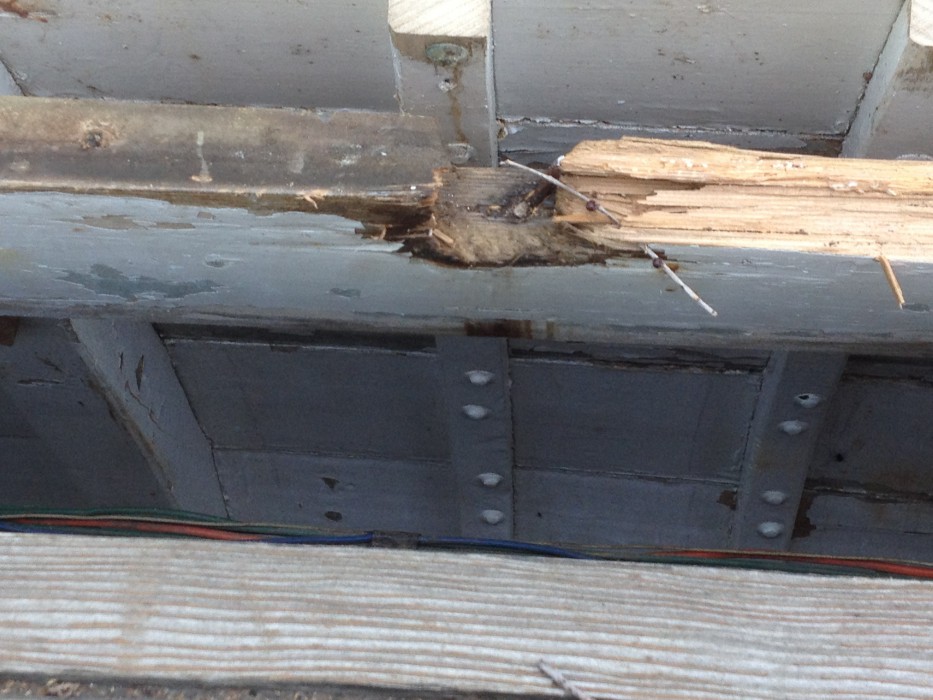
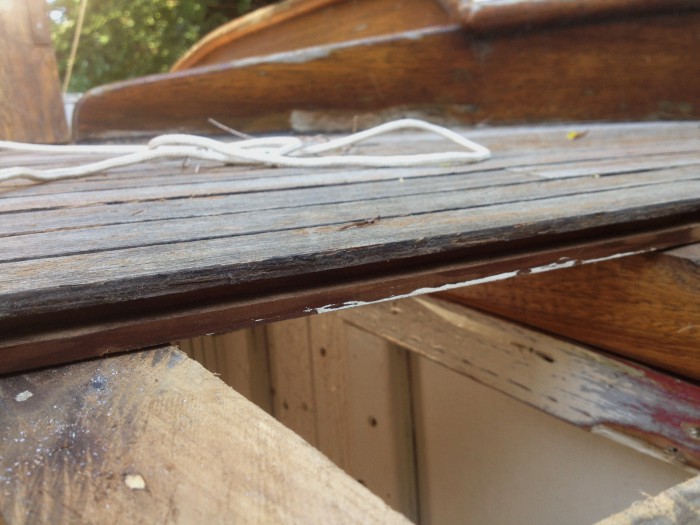
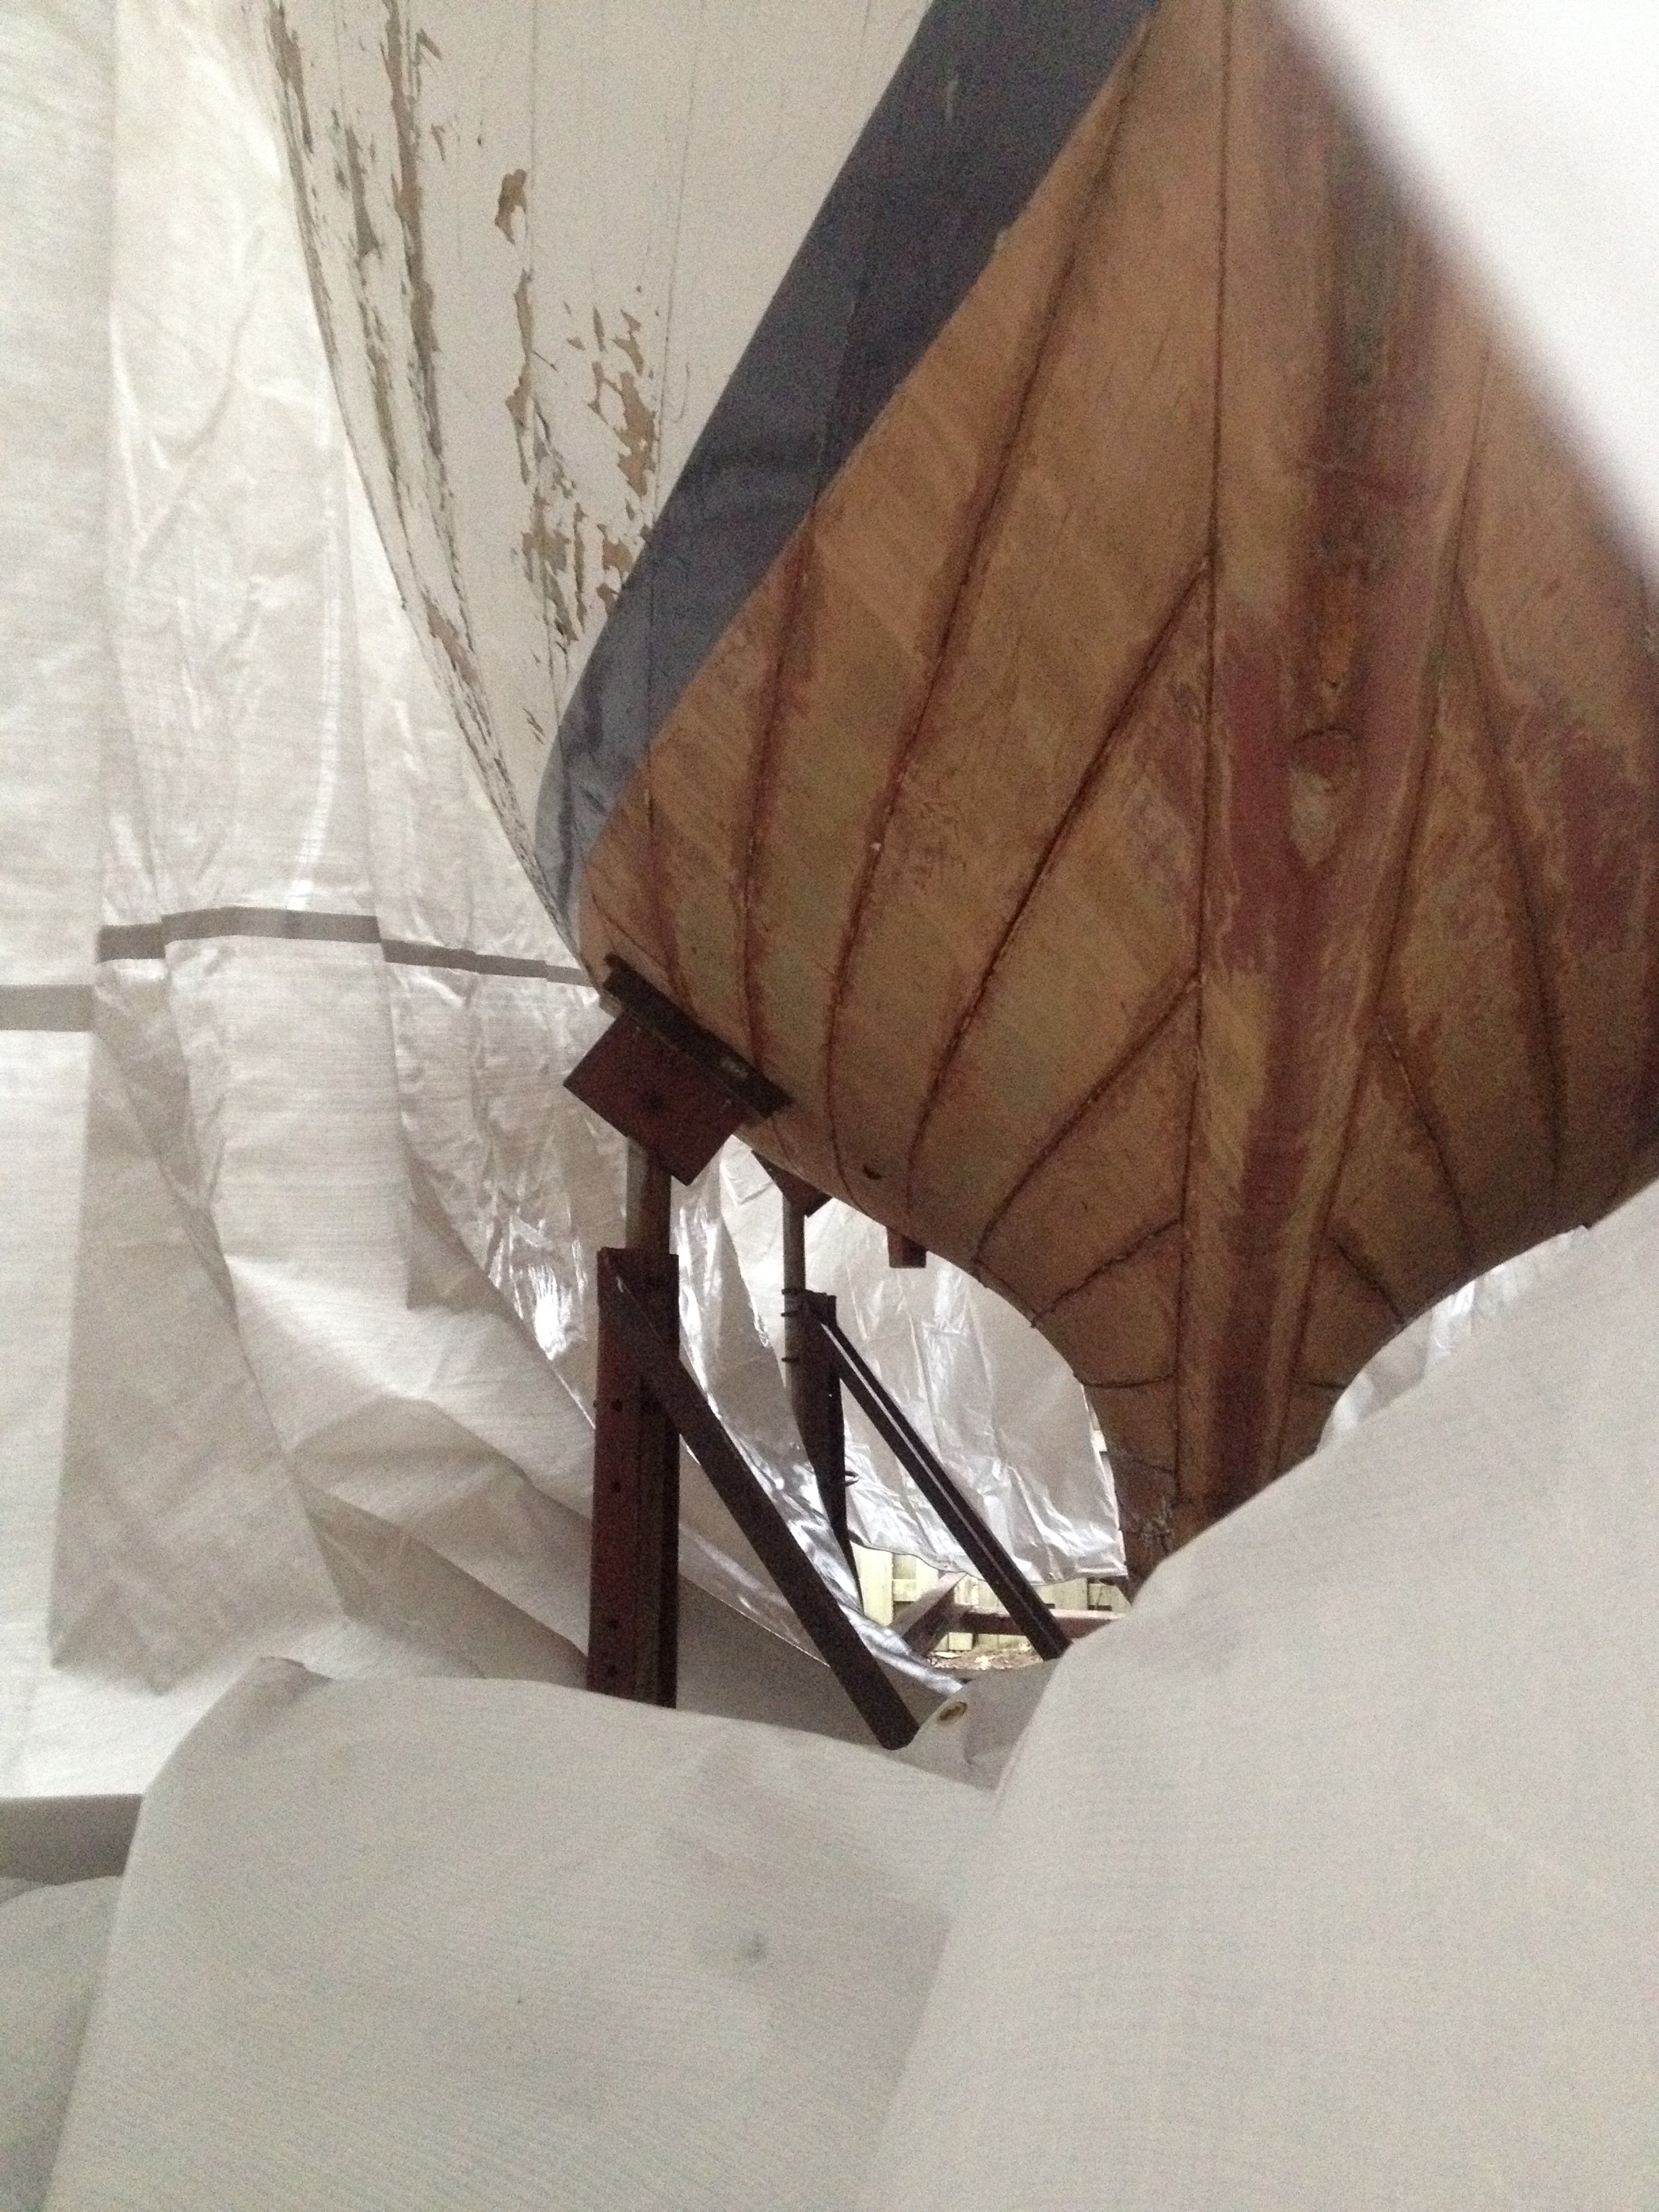
The starboard topsides proved to be a bit more of a challenge than the port-sides.  It seems a good deal of Reverie’s life was spent taking the hard knocks on the starboard side.  There, I found replaced planks (More on that later…  Much more).  There were areas that had been faired with what appeared to be an epoxy-based filler.  Oh yes, someone used 5200 for caulking the plank seams. I have seen 5200 recommended, in various online forums where free advice is handed out like champagne on New Years Eve; copiously and carelessly.  Dear reader, if you are ever thinking of restoring or maintaining a wooden boat and you choose to use 5200 to caulk seams, let me tell you, Old Nick has a special task in hell for you: eternity cleaning 5200 from plank seams.  Don’t say I didn’t warn you. 5200 will be used in this project to great effect, later on down the road but not here.

I had to modify my heat gun/scraping technique and managed to get the brunt of it done by sharpening a flat scraper and using it much like a cabinet scraper.  This produced a better surface than the method I used on the port, side reducing sanding time significantly.  It took 60 hours to scrape, sand and oil the port topside compared to about 80 hours for the starboard.

IMG_20161118_095558194.jpg

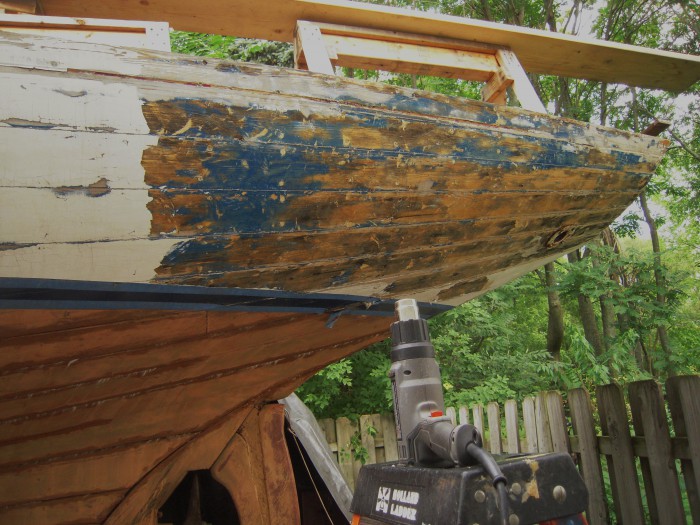
Starboard Topsides scraped, sanded and oiled

IMG_20161118_095447711.jpg

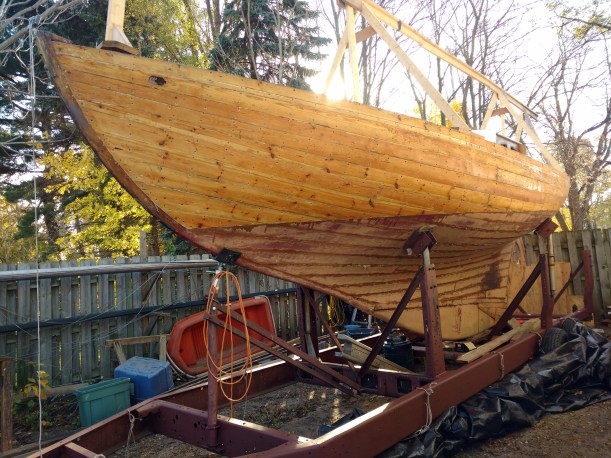
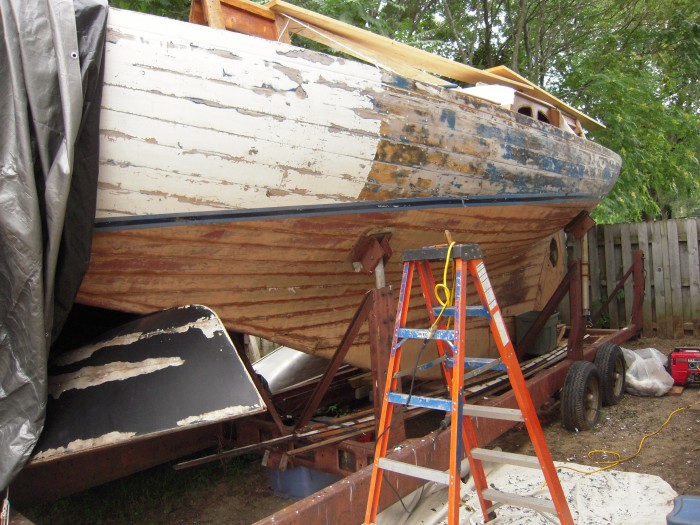
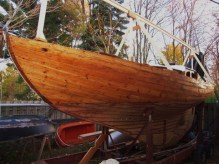
Port Topsides scraped, sanded and oiled. Trailer looks spiffy with some fresh primer.

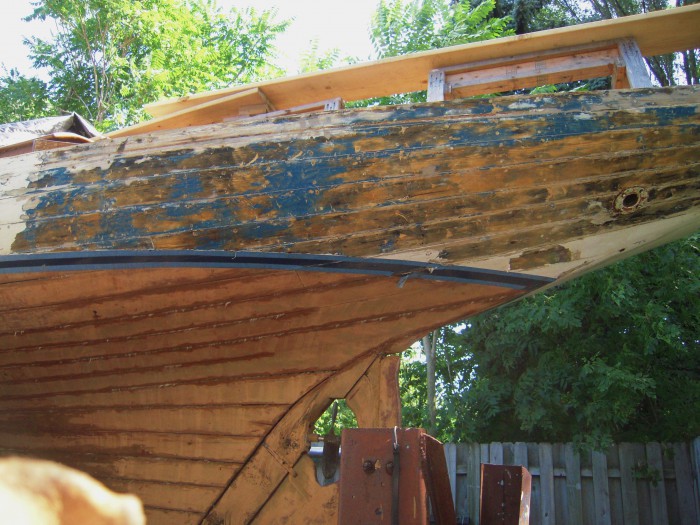
The past few days were near record highs for November with temps around 70° F.  Both sides got two coats of piping hot tung oil and turpentine.  The boat smells wonderful! Reverie looks so different without the layers of cracked, peeling paint and exposed wood.

As the air pressure began to fall and the breeze became a gale, I put a quart of primer on the trailer.  It to looks happier.  I took a 12 ton bottle jack and it all rests  on cement blocks instead of the trailer tires. After I got the trailer leveled, I got the boat leveled a bit more.   It really helped to stabilize the whole thing and get the tires off the ground.  I gave the lug nuts a good soak of penetrant and plan put the tires out of the elements for the duration of the project.  With the wheels off, the brakes will be begging for an overhaul… .

Scraping, sanding and oiling below the waterline will go much better as there won’t be scaffolding involved and the paint seems to come off easier.  We’ll see.  For now, we can move forward and I no longer have that messy job to mess up my day. Today, my aches were a little less achy.  My step, a little more peppy. There’s a little vim in my vigor.   I even had to raise the rear view mirror in the car from so much slouching.  Yes, the world was a kinder place, now that that is done.  Onward!


2 Comments

Into The Light

The new year is upon us and it’s finally starting to look like January here along the Lake Michigan shoreline.  We had an unseasonably warm December due to the El Niño-Southern Oscillation (ENSO) cycle.

   http://oceanservice.noaa.gov/facts/ninonina.html

As avid cross country skiers, we were somewhat disappointed by the lack of snow.  As boat restorers, we took advantage of the mild weather to further the cause and get as much done on Reverie as possible before Winter set in.  Fortunately, we tempered these hours of work with some Grade-A, late season sailing aboard Prudence.  

Winter weather has now arrived and we got down near the single digits Fahrenheit last night.  Lake Effect snow has been quietly dusting us and the ground is now covered in white. Last week, we put a tarp over Prudence and brought her outboard in from the cold; time to replace that old water pump impeller I’ve been putting off all season.

Whenever there’s good news and bad news to be communicated, I prefer to have the bad news delivered first.  Candy coating something before the medicine does not help the medicine go down “in the most delightful way”.    Prepare yourself.  Gird your loins.  Here it comes.

If you have been following this blog, you have ascertained we are removing the entire deck of Reverie to get at the rotted deck beams and carlines.  I have no doubt in my mind that this decision was indeed, the best tack. It will also facilitate the replacement of broken frames.  The port-side tongue and groove decking has been carefully removed, labelled and toted off to storage. It proved to be a bit of a task seeing that many of the strips are in excess of twenty feet.  The port-side deck beams are now visible, as are the  areas aft near the cockpit and transom that get little ventilation.

The entire port-side sheer clamp is now visible and there is evident damage amidship.  The sheer clamp is a structural  member that runs stem to stern and serves to support the deck beams and provide resistance to the torsional twisting of the hull.  It is bolted along the inside of the hull at the frames and the deck beams are half-dovetailed into it.  It appears to be made of cypress wood; a good choice considering the need for a light, strong,  rot resistant wood.   I thought of white oak as an alternative for replacement yet was convinced otherwise after researching the weight difference between the two.  Had we gone with oak, there would be another 300 lbs. added to the sheer.

IMG_2779

The port-side sheer clamp showing evident signs of rot amidship.

IMG_2782

A closeup of the rot on the port-side sheer clamp.

Once the port-side deck was removed, it became time to prep the starboard-side deck for removal.  Julia began the monotonous chore of removing all the bungs from the toe rail in order to get at the 4 inch bronze screws holding it down every 6 inches.  While she did that, I worked on the deck hardware.  I removed the starboard winch, cleats, anchor chocks, spinnaker pole chocks and, with Julia’s help, the stanchion bases.

The stanchion bases are particularly hard to get at as they are fastened between the sheer clamp and the sheer plank.  Inside the cabin, it was a tight squeeze but in the cockpit, it seemed nigh impossible.  I had to lie on my back and reach through one of the cuddy holes in the cockpit with my arm fully extended all the while attempting to reach the nut I couldn’t see with a deep socket  and extension.  This maneuver was what I imagine it would be like wearing a blindfold while trying to steal a bag of chips from the top row of a vending machine by reaching up through the discharge bin.  While I attempted this feat of derring-do, Julia waited  patiently on the ladder ready to unscrew the fastener once I found the nut.

Lying on my back, in this twisted state, up became down and down became up.  I fished around here and there but could not find the nut to the stanchion base.  I rolled the socket wrench into the small of my hand hoping for some tactile reassurance that this wasn’t all a bad, painful dream and that I would eventually find the nut and bolt that were obviously eluding me.  I extended my forefinger here and there and suddenly, it felt as if I had stuck it clean through some wood!  “…all part of this bad dream”, I thought.  “Just relax.  Embrace the pain.  Find the bolt.”

My eyes were closed.  They were useless in this endeavor. All sensory input was being conveyed through an arm bent into positions it was never meant to be in yet, there it was: the sensation that I had my finger stuck clean through a piece of wood. I wriggled my forefinger around.   It was as if it was stuck through a hole in a sock; a 5/4 inch thick rotted sock.  I felt air on the other side.  Was my finger sticking through the sheer plank and the world outside?  “No”, Julia assured me.  “I can’t see your finger.”  Then, the truth set in.  I had stuck my finger through the rotten starboard-side sheer clamp!

I writhed about like a crocodile being swallowed by a python,  still unable to find the damn bolts. I began to see a shining light through my closed eyes.  I heard a voice beckoning me.  “Come to the light!”   I reached out, with my contorted arm, and touched the stanchion bolt I so desperately sought.  I focused, careful not to let this moment slip away.  I got the socket on the nut.  Julia unscrewed it from above.

Bolt number two was right next to a frame but now that my arm was a bent pipe cleaner, I got the socket onto it, as well.  The two other bolts to the stanchion base were screwed through the deck and into the sheer clamp.  The cause of the rot, perhaps?  They pulled out without even needing to be unscrewed.  The stanchion base was finally liberated from the covering board.  It then took several minutes to extract my now serpentine arm from the labyrinth while I relived the pain of a long-ago separated shoulder.  Why did I ever think rollerblading was a good idea?

The outcome of these travails are the issues with the starboard-side sheer clamp that will be come into focus as work progresses.  It was  reminder that there is more than meets the eye in our little project.  We’re certainly not out of the woods with these hidden issues.  “… two steps back.”  I’m glad we found this out before Winter set in.   It gives us time to plot out the next course of action. These sheer clamps must be addressed before the deck beam work can start.   I guess that big slab of white oak we have will have to wait a bit before it’s sawn into deck beams.  Time to start shopping for some nice cypress.

Now that we’ve had our medicine, I must say that it has been a delightful season.  El Niño might be wreaking havoc all over the world but he allowed us to get out on our Com-Pac 16, Prudence for some extra-fine Fall/Winter sailing.  One of the real highlights of the season was sailing on Christmas Day.  There had been a raging gale several days before Christmas with 22 foot waves on Lake Michigan.  That’s 22 foot December, Great Lakes waves which are steeper and heavier than ocean waves. While not 22 feet, there were still some big rollers that picked up in the 20 knot afternoon breeze. The waves were very uniform with an occasional series standing above the others.  It was consistent and certainly memorable.

The icy, steel blue water was beautiful and deadly as we beat  5 miles WNW onto the lake.  We were driving so hard, we kept the Port Sheldon pier off our stern with almost no leeway to the South.  Prudence yields a bit to the currents so this was a pleasant surprise.  We would be able to triangulate back to the pier.  Three legs and we’d be home.   We ended up gybing off on the second leg then rounding back NE as Prudence didn’t want to tack into the rollers that were beginning to stand up 5 miles offshore.  On leg three, we ran S along the Lake Michigan shoreline back to Port Sheldon. That leg ended way too soon.

DSCN1304

October on Lake Michigan

DSCN1405

November sailing- Holland, Michigan

DSCN1419

November sailing. Coming into Lake Macatwa from Lake Michigan.

DSCN1453

Christmas Day 2015. 5 miles out, 5 miles back with Julia’s daughter, Chloe. Fine sailing. -Port Sheldon, Michigan

Christmas Day - Lake Michigan

Christmas Day – Lake Michigan

It has, indeed, been a delightful year filled with hard work and dedication that shows in all we have accomplished  It has been a year of change and sacrifice balanced with the enjoyment of life’s small pleasures.  It helps to have someone like Julia who can see the forest through the trees.  She has been working tirelessly alongside me.  Even during the 60 hours it took me to strip the paint from the port topsides,  she was there at the end of the day with a couple of cold beers that we would drink at the Sunset Lounge, our two lawn chairs in the shade of Reverie.  Here’s to everyone having an eventful and  productive 2016.  Cheers!


4 Comments

Tung Oil and Turpentine

We are well into November and the weather has been good to Reverie’s restoration project.  The leaves were late to turn this year due to a warm Fall but they have now fallen  rapidly and carpet the earth in all shades of red, yellow and brown.  Still, the mild weather persists.   The birds aren’t quite so convinced of an eternal Autumn.  They know what’s about to happen and are acting accordingly.  We saw our first dark eyed junco the other day while working on Reverie; a sure sign of the change in seasons.  The shoreline of the Great Lakes is, well, a great place to watch migrating birds.  We were even  lucky enough to see 4 endangered whooping cranes the other day on a back road drive from Holland to Grand Rapids. Their size is impressive.

On a somber note, today is the 40th anniversary of the sinking of the Great Lakes freighter, Edmund Fitzgerald. It vanished without a trace in a massive storm on Lake Superior and has since been found lying at the bottom of the lake broken in half by the mighty waves.  http://www.shipwreckmuseum.com/the-fateful-journey-62/

102 years ago, the Great Lakes Storm of 1913 sank 19 ships with over 250 lives  lost on the open waters of these inland seas.  http://www.nws.noaa.gov/com/weatherreadynation/news/131107_white.html#.VkH8LdKrTwc

Today, is nothing like those days.  It is calm and mild and I’m going off to work on Reverie for a while thankful for this weather as I solemnly recall those who lost their lives on the Great Lakes.

Yesterday, we passed a waypoint in the restoration project.  After 60 hours of scraping, sanding, and the cleaning of every single fastener hole on the port topside, I was able to apply a coat of tung oil and turpentine!  This was a process that took a lot longer than expected but we are pleased with the results.  The mixture, consisting of 50% tung oil and 50% turpentine, was heated to near boiling to facilitate its penetration into the thirsty yellow pine planking.  I could see it immediately expanding some of the surface cracks that had begun in the parts of the topside that had been without paint for an undetermined amount of time.  I worked this delightful smelling mixture into all the exposed fastener holes with a 3 inch chip brush.  You could see the hot oil and turpentine being sucked into the holes. It made all the time consuming work worth it.  There are certainly faster ways to strip the hull down and sand it but I would rather spend 2 or 3 or 4 times the amount of time to get it the way I wanted it and err on the side of safety.

The frames, which are basically the ribs of the skeleton, are laid out in a pattern of one very heavy white oak frame fastened with heavy galvanized nails and then two smaller frames fastened with copper rivets.   These smaller oak frames are steam bent and still fastened tight.   We will most likely add bronze screws to the heavy frames but that’s going to require some investigation of the existing nails.  For now, I’m guessing they have run their course in usefulness.  When white oak and steel get together, oak wins.  I removed the flat-head steel screws to the engine exhaust flange that was backed up with an oak block and there was barely any thread left.  The use of quality, hot dipped galvanized fasteners is a money saver and they served well for over 60 years but we’re going with silicon bronze.  The oil filling the fastener holes is a good thing.  It  expands the wood and seals it from the oxygen needed to create rot.

 The whole port topside consumed a little less than a half gallon of the tung oil/turpentine mixture.  The tung oil is 100% pure tung oil and costs about $70 dollars a gallon.  Tung oil cannot be allowed access to oxygen as this begins the curing process.  I poured off half the gallon of pure tung oil into a half gallon cider jug leaving no room for air and will save it for a later date.  That will keep for quite some time, as is.  I expected to use more of the 50/50 mixture but was happy to have used less, seeing we’re approaching $100 a gallon for this elixir, once the cost of the turpentine is factored in.  “Prepare for the worst, hope for the best.”  Last night, I had to scramble around for another half gallon container to put the rest of the 50/50 mixture in and came up with an empty half gallon bottle of Scotch in our recycling bin(now how did that happen?).   It was almost spot on one half gallon with a glass vitamin bottle to spare. Now I have to find some wood that needs treating today so as not to waste those precious fluids in the vitamin bottle.  That shouldn’t be difficult.   So, dear reader, I must be off and begin the next phase of the project which is to do the same thing to the forlorn  starboard side that now looks even more desperate compared to the freshly oiled port-side.  I will leave you with some pics of the progress.

Best Regards,

Roger

60 hours of scraping, sanding and oiling. Done!

60 hours of scraping, sanding and oiling. Done!

Reverie's lovely overhang. The one small plank is a former repair made of dissimilar wood and will most likely be replaced.

Reverie’s lovely overhang. The one small plank is a former repair made of dissimilar wood and will most likely be replaced.

Starboard topside looking forlorn and in need of help.

Starboard topside looking forlorn and in need of help.

Yikes!

Yikes!


Leave a comment

The Elephant in the Room

As the last week of August fades to memory, it’s time to reflect on what’s been done and plan for the cooler months ahead.  For many people, summer ends at Labor Day; the tug of the academic calendar is just too much for folks raised to abide by the “back to school” mentality.  They may not be in school or have children in school but the hand is writing on the wall.  We are bombarded by yet another consumer milestone.  “Buy, buy, buy”, the ads say.  When I’m out shopping, I feel like maybe I should pick up a fresh pack of crayons or maybe some paste.

Here in West Michigan, we see the last of the tourists “recreating profusely”; they’re squeezing that last bit of juice from the lemon before it’s time to get the kids off to school.  Then, it’s a little easier to breathe around here.  We don’t have to fight the crowds to get around and no longer have to plan our sailing time during the week.  It was so hot and humid for the first part of August, there was not much going on in the way of boat work.  I’m not partial to heat indexes in the lower 100’s and the fact that I’m using a heat gun only reinforces my prejudices.

Late July and some of August saw us dutifully removing the rest of the covering board and begin the process of removing the deck from Reverie.

IMG_2747IMG_2771IMG_2761

That went as well as it could and we are now able to see the extent of the rot to the port-side deck beams.  There weren’t really many surprises as I was expecting to find more rot than was visible from the interior.  After all, that is one of the main reasons we are completely removing the deck.   We got 3 rows of the tongue and groove decking off yet, something wasn’t quite right.  There was an elephant in the room and it wasn’t going away.

The warm weather did slow us down but it was the impending cold weather that made the elephant more apparent.  While focusing on the deck and executing the plan to remove it, time was ticking away.  After seeing what would need to be done with the deck beams, the seemingly innocuous topsides began to call out for help.  The paint was crazed and peeling.  There were bare spots from an attempt, made by the previous owner, to sand them.  I’m not sure how long ago the attempted sanding took place but the sections of exposed bare wood was showing signs of weathering that could lead to wholesale splitting of the lovely,  longleaf yellow pine that planks our fair vessel.  It was time to feed the elephant.

Completely stripping the multiple layers of topside paint was the only course of action seeing how the paint had split and cracked where it hadn’t already been sanded.  Reverie has been out of the water for years and the planking is a lot drier than a wooden boat’s should be.  Dry planks can stress the fasteners and shrink the dimensions enough to cause problems when it comes time to recaulk the seams.  If the seams are caulked when it’s dry, the expansion can cause undue stress and actually cause the fasteners to pull out.  Not good.

It’s going to take about 30 hours per side to strip the paint and a good 20 to do the sanding and oiling.  After the oil dries, the initial coat of primer goes on and Reverie will be much happier.  So, Julia gets about 100 hours of work time off while I    take one for the team since there’s no reason we should both be exposed to this mess.  She hasn’t stopped work altogether; she’s working on removing the multitude of bungs (wooden plugs that cover screw holes) from the cockpit coaming when I’m not making too much of a mess.

Wearing a respirator for 80 hours is not something I’m enjoying but it has to be done. I have the heat gun set just hot enough to lift the paint but not hot enough to burn it.  I’ve done some research on the release of lead and other toxic substances and am working at a lower temperature to avoid as much exposure to lead as I can.  I watched a video on youtube of this guy using a heat shrink gun and literally burning the paint off the topsides.  He said he can get a whole boat stripped in one day.  He wasn’t wearing a respirator.  I think I’ll err on the side of caution.

See you when it’s done.

DSCN1044IMG_2796006DSCN1138


2 Comments

Under wraps while the snow flies.

photo (1)