Restoring Reverie

: The Art of Restoring & Sailing a Classic Wooden Sailboat


Leave a comment

‘Tis The Season For Boat Work

Winter is here!  That means different things to different people.  For us, here at Camp Reverie,  it’s a busy time accentuated by the lengthening of each day. Today, we have sunset 9 minutes later than on the Dec. 21 solstice.   That means we’re packing up just a little bit later every day and getting more done with each passing week.

Winter has always been the time for boat work.  It was a time to take care of some of the large projects while the boat is out of the water and sailing is not a distraction. Endless projects  pile up during the warmer months that need to be addressed in the off-season. Projects, projects, projects; we sailors love our projects.

One of the reasons I look forward to winter is the fact that I can get outside and perform some of the heavy labor without heat and humidity getting in the way.  In the winter, you can always take off a layer if you’re too hot.  I haven’t been cold once this season. Keep it moving.

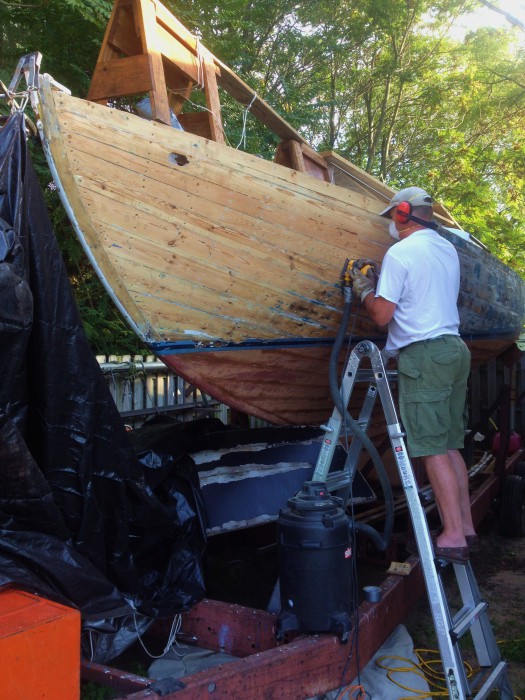
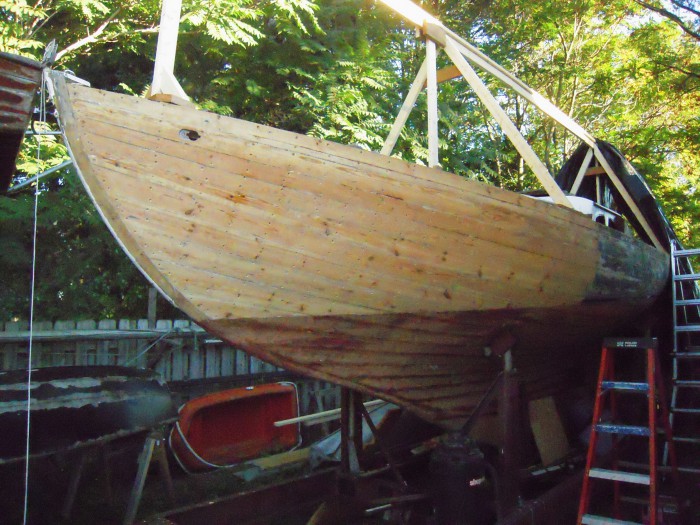
Thankfully,  we were able to take care of everything that needed to get done before the snow flew and have a formidable list to knock out before spring. Getting under the weather wire on the topsides project felt like a real victory as it left a clearer path to getting some other projects finished by spring.  There’s no hibernation going on here at Camp Reverie.  Well, maybe a little.

We can now get back to the removal of the deck and deck framing along with new sheer clamps and shelf, for good measure. Instead of hiding out from 90° F and 90% humidity, it’s lake effect rain showers,  lake effect snow showers and blistering cold winter gales.  I have had to shovel out a work area multiple times already and expect it to happen repeatedly over the winter.   Holland is in the Lake Michigan snow belt so we are no strangers to a stray flake or two.

One of this winter’s first projects was to measure out the  deck framing and sheer clamps to get a materials requirement for the new deck framing, sheer clamps and shelf.  I did that on a day when the wind was gusting up to 60 mph which shook and rattled poor Reverie.  It felt a bit surreal as I measured in the darkness with the aid of a shop light illuminating a small ring wherever I moved it.  With her interior removed, Reverie picks up vibrations from without and sounds sympathetic tones much like a stringed instrument.  On a good day, it’s pleasant and interesting.  In a gale, it’s a bit unsettling.

When the weather allows, I’ve been outside running rough lumber through the planer.  Last year, I picked up a nice 2″x 8″ x 12′ piece of white oak from Armstrong Millworks in Highland, Michigan. In late November, I paid a visit to L.L Johnson Lumber, in Charlotte, Michigan, where I picked out some nice 5/4″ x 12″ x 14′ southern yellow pine and some nice yellow birch for a furniture project.  The yellow pine will be used to replace the bad planks and , possibly, for the sheer clamps. Add to the mix about 100 board feet of rough red oak that was just sitting around and you have some work on your hands.

img_20161213_124548260-1

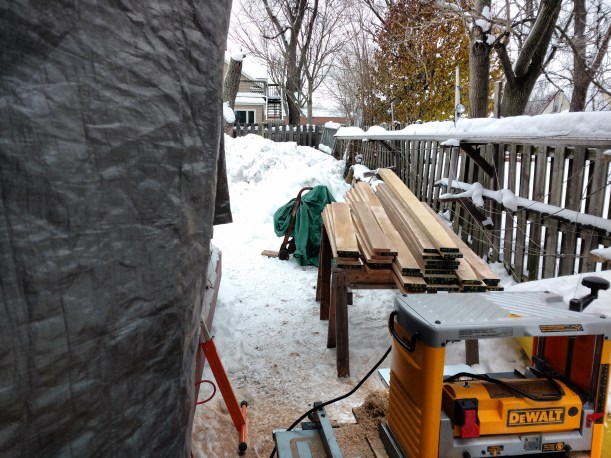
There was 100 board feet of red oak and 50 board feet of  yellow birch on top of the boat wood.  No sense just moving it.  Let’s make it useful.


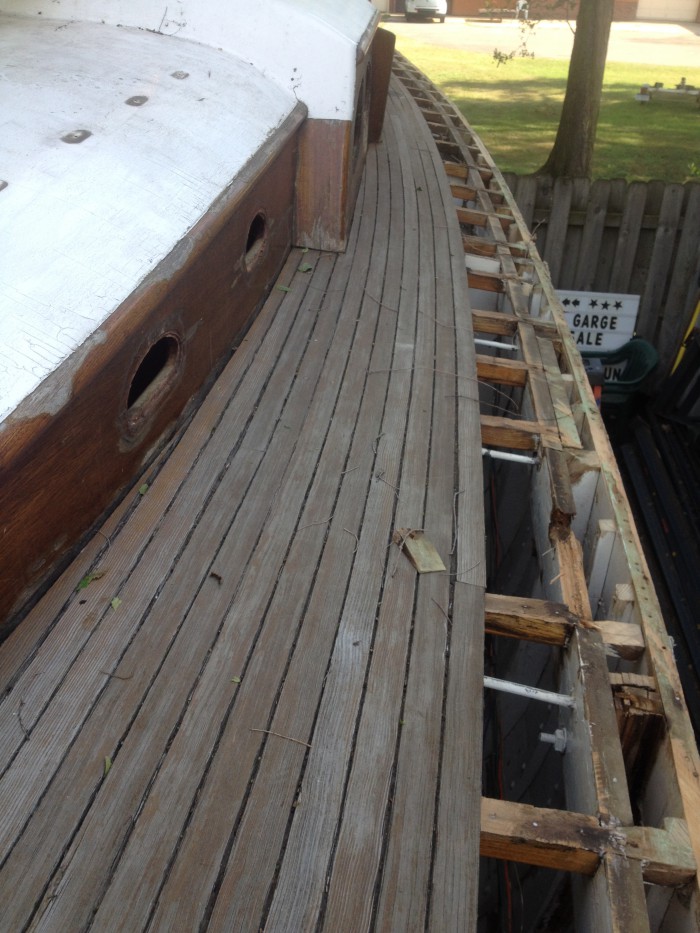
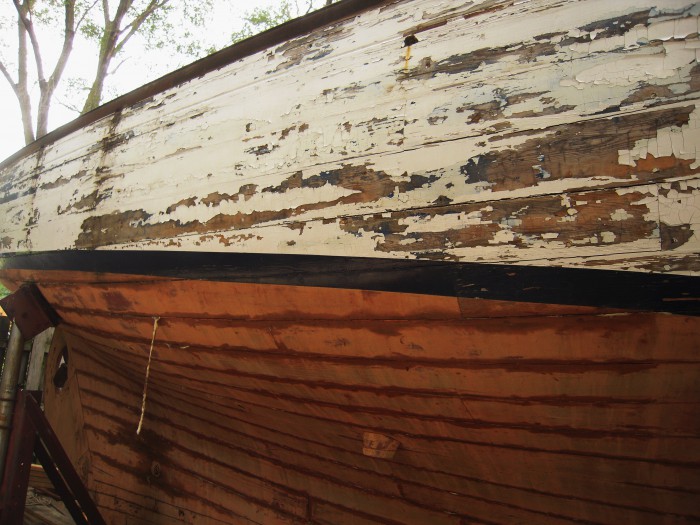
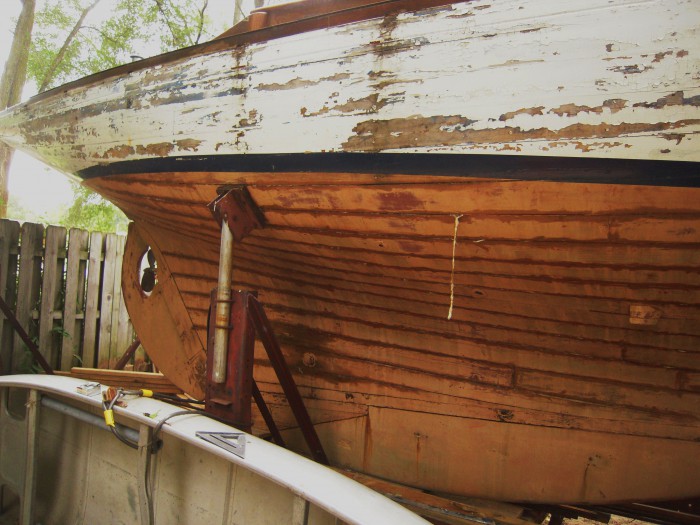
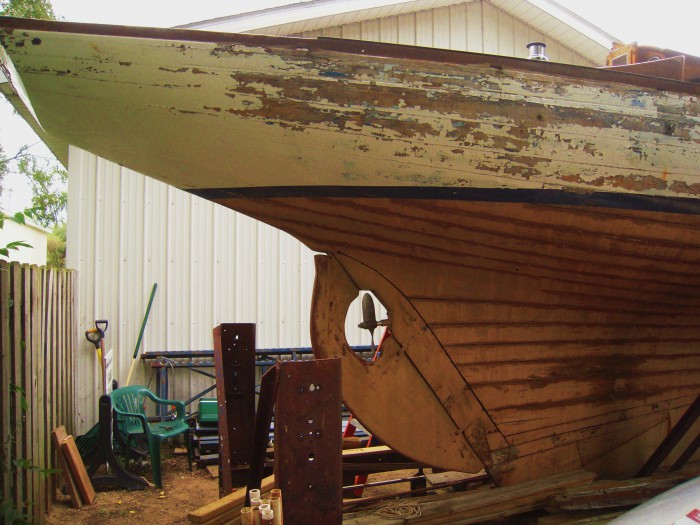
As soon as all the wood is processed, we can resume deck removal.  When I was on board measuring deck beams, I had a chance to look over the construction of the deck  framing and do not think the original builder of the hull and the builder of the deck/ interior are the same.  The hull is sturdy and overbuilt.  I am impressed by how well it has held together. The heavy frames with intermittent steam-bent frames is reminiscent of old work boat construction.

IMG_20161226_142855564.jpg

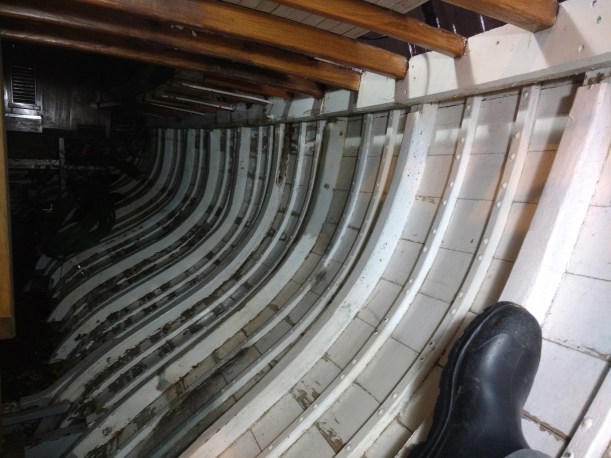
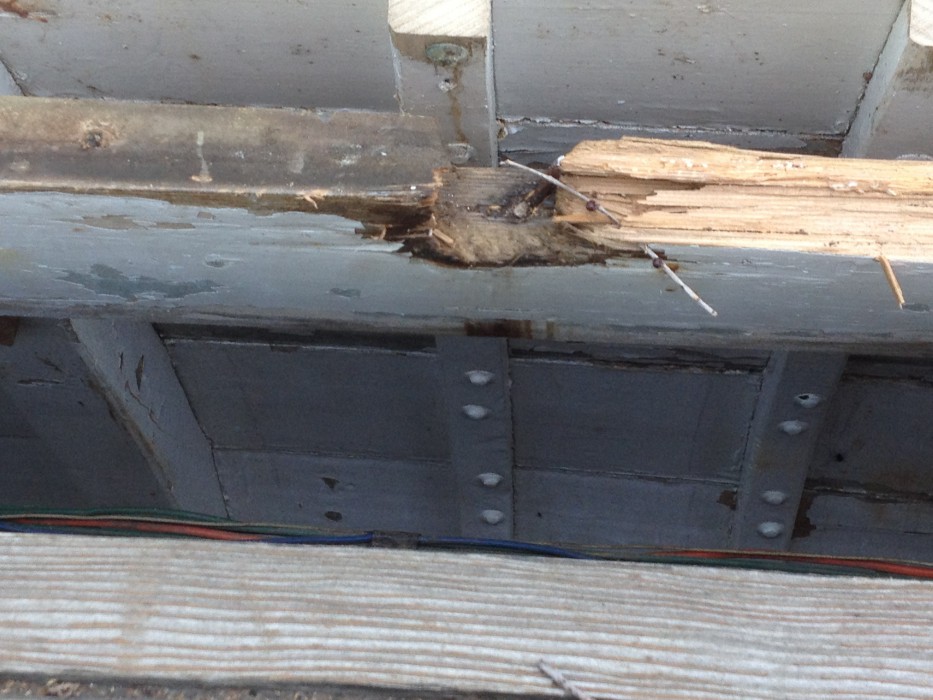
Sturdy hull with lightly built deck framing and sheer clamp.  Part of the mystery.

Conversely, the interior and deck-beam construction leave something to be desired, in the way of craftsmanship.  The deck framing and interior won’t be copied from what was found.  Both the deck and the interior will be rebuilt as sturdily as the hull.  Instead of ash for the deck beams, there will be white oak.  The sheer clamp will either be of white oak or yellow pine with a shelf added to the sheer. More on that once the deck framing commences.

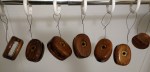
Winter shall proceed as such:  it’s outside whenever possible and lots to do inside when being inside’s a good thing.  Our front bathroom has become the varnish booth.  The fan works great for exhaust and we haven’t had any issues with fumes while I varnish up Reverie’s wooden blocks.

Stripping down the blocks and soaking them in hot oil was one of the first projects we did when we got the boat. The oil had over a year to dry so I gave them a sanding and have been dipping them in a can of spar varnish diluted with about 30% turpentine.  As I write, they have 5 coats on them.  They will get their sixth and final coat tomorrow and reassembled shortly after that.  All said and done, there will be close to 40 hours devoted to the block restoration project alone.

“O God! methinks it were a happy life,
To be no better than a homely swain;
To sit upon a hill, as I do now,
To carve out dials quaintly, point by point,
Thereby to see the minutes how they run,
How many make the hour full complete;
How many hours bring about the day;
How many days will finish up the year;
How many years a mortal man may live.”
~William Shakespeare – King Henry Vl

Along with the varnishing, there is always a bit more organizing and sorting of everything from boat hardware, to tools, to wood, to lp records, to books and to all the other things that get piled around and in the way.  We are removing the clutter and making a streamlined restoration machine.  I will leave you with a shot of some fine, vintage power tools that got new cords and cleaning as part of the indoor winter work.

Happy 2017 from Julia and Roger!  Thanks for following our project.

IMG_20170102_162714944.jpg

Tools that are as old as Reverie!  Quality never goes out of style.

Save


2 Comments

Into The Light

The new year is upon us and it’s finally starting to look like January here along the Lake Michigan shoreline.  We had an unseasonably warm December due to the El Niño-Southern Oscillation (ENSO) cycle.

   http://oceanservice.noaa.gov/facts/ninonina.html

As avid cross country skiers, we were somewhat disappointed by the lack of snow.  As boat restorers, we took advantage of the mild weather to further the cause and get as much done on Reverie as possible before Winter set in.  Fortunately, we tempered these hours of work with some Grade-A, late season sailing aboard Prudence.  

Winter weather has now arrived and we got down near the single digits Fahrenheit last night.  Lake Effect snow has been quietly dusting us and the ground is now covered in white. Last week, we put a tarp over Prudence and brought her outboard in from the cold; time to replace that old water pump impeller I’ve been putting off all season.

Whenever there’s good news and bad news to be communicated, I prefer to have the bad news delivered first.  Candy coating something before the medicine does not help the medicine go down “in the most delightful way”.    Prepare yourself.  Gird your loins.  Here it comes.

If you have been following this blog, you have ascertained we are removing the entire deck of Reverie to get at the rotted deck beams and carlines.  I have no doubt in my mind that this decision was indeed, the best tack. It will also facilitate the replacement of broken frames.  The port-side tongue and groove decking has been carefully removed, labelled and toted off to storage. It proved to be a bit of a task seeing that many of the strips are in excess of twenty feet.  The port-side deck beams are now visible, as are the  areas aft near the cockpit and transom that get little ventilation.

The entire port-side sheer clamp is now visible and there is evident damage amidship.  The sheer clamp is a structural  member that runs stem to stern and serves to support the deck beams and provide resistance to the torsional twisting of the hull.  It is bolted along the inside of the hull at the frames and the deck beams are half-dovetailed into it.  It appears to be made of cypress wood; a good choice considering the need for a light, strong,  rot resistant wood.   I thought of white oak as an alternative for replacement yet was convinced otherwise after researching the weight difference between the two.  Had we gone with oak, there would be another 300 lbs. added to the sheer.

IMG_2779

The port-side sheer clamp showing evident signs of rot amidship.

IMG_2782

A closeup of the rot on the port-side sheer clamp.

Once the port-side deck was removed, it became time to prep the starboard-side deck for removal.  Julia began the monotonous chore of removing all the bungs from the toe rail in order to get at the 4 inch bronze screws holding it down every 6 inches.  While she did that, I worked on the deck hardware.  I removed the starboard winch, cleats, anchor chocks, spinnaker pole chocks and, with Julia’s help, the stanchion bases.

The stanchion bases are particularly hard to get at as they are fastened between the sheer clamp and the sheer plank.  Inside the cabin, it was a tight squeeze but in the cockpit, it seemed nigh impossible.  I had to lie on my back and reach through one of the cuddy holes in the cockpit with my arm fully extended all the while attempting to reach the nut I couldn’t see with a deep socket  and extension.  This maneuver was what I imagine it would be like wearing a blindfold while trying to steal a bag of chips from the top row of a vending machine by reaching up through the discharge bin.  While I attempted this feat of derring-do, Julia waited  patiently on the ladder ready to unscrew the fastener once I found the nut.

Lying on my back, in this twisted state, up became down and down became up.  I fished around here and there but could not find the nut to the stanchion base.  I rolled the socket wrench into the small of my hand hoping for some tactile reassurance that this wasn’t all a bad, painful dream and that I would eventually find the nut and bolt that were obviously eluding me.  I extended my forefinger here and there and suddenly, it felt as if I had stuck it clean through some wood!  “…all part of this bad dream”, I thought.  “Just relax.  Embrace the pain.  Find the bolt.”

My eyes were closed.  They were useless in this endeavor. All sensory input was being conveyed through an arm bent into positions it was never meant to be in yet, there it was: the sensation that I had my finger stuck clean through a piece of wood. I wriggled my forefinger around.   It was as if it was stuck through a hole in a sock; a 5/4 inch thick rotted sock.  I felt air on the other side.  Was my finger sticking through the sheer plank and the world outside?  “No”, Julia assured me.  “I can’t see your finger.”  Then, the truth set in.  I had stuck my finger through the rotten starboard-side sheer clamp!

I writhed about like a crocodile being swallowed by a python,  still unable to find the damn bolts. I began to see a shining light through my closed eyes.  I heard a voice beckoning me.  “Come to the light!”   I reached out, with my contorted arm, and touched the stanchion bolt I so desperately sought.  I focused, careful not to let this moment slip away.  I got the socket on the nut.  Julia unscrewed it from above.

Bolt number two was right next to a frame but now that my arm was a bent pipe cleaner, I got the socket onto it, as well.  The two other bolts to the stanchion base were screwed through the deck and into the sheer clamp.  The cause of the rot, perhaps?  They pulled out without even needing to be unscrewed.  The stanchion base was finally liberated from the covering board.  It then took several minutes to extract my now serpentine arm from the labyrinth while I relived the pain of a long-ago separated shoulder.  Why did I ever think rollerblading was a good idea?

The outcome of these travails are the issues with the starboard-side sheer clamp that will be come into focus as work progresses.  It was  reminder that there is more than meets the eye in our little project.  We’re certainly not out of the woods with these hidden issues.  “… two steps back.”  I’m glad we found this out before Winter set in.   It gives us time to plot out the next course of action. These sheer clamps must be addressed before the deck beam work can start.   I guess that big slab of white oak we have will have to wait a bit before it’s sawn into deck beams.  Time to start shopping for some nice cypress.

Now that we’ve had our medicine, I must say that it has been a delightful season.  El Niño might be wreaking havoc all over the world but he allowed us to get out on our Com-Pac 16, Prudence for some extra-fine Fall/Winter sailing.  One of the real highlights of the season was sailing on Christmas Day.  There had been a raging gale several days before Christmas with 22 foot waves on Lake Michigan.  That’s 22 foot December, Great Lakes waves which are steeper and heavier than ocean waves. While not 22 feet, there were still some big rollers that picked up in the 20 knot afternoon breeze. The waves were very uniform with an occasional series standing above the others.  It was consistent and certainly memorable.

The icy, steel blue water was beautiful and deadly as we beat  5 miles WNW onto the lake.  We were driving so hard, we kept the Port Sheldon pier off our stern with almost no leeway to the South.  Prudence yields a bit to the currents so this was a pleasant surprise.  We would be able to triangulate back to the pier.  Three legs and we’d be home.   We ended up gybing off on the second leg then rounding back NE as Prudence didn’t want to tack into the rollers that were beginning to stand up 5 miles offshore.  On leg three, we ran S along the Lake Michigan shoreline back to Port Sheldon. That leg ended way too soon.

DSCN1304

October on Lake Michigan

DSCN1405

November sailing- Holland, Michigan

DSCN1419

November sailing. Coming into Lake Macatwa from Lake Michigan.

DSCN1453

Christmas Day 2015. 5 miles out, 5 miles back with Julia’s daughter, Chloe. Fine sailing. -Port Sheldon, Michigan

Christmas Day - Lake Michigan

Christmas Day – Lake Michigan

It has, indeed, been a delightful year filled with hard work and dedication that shows in all we have accomplished  It has been a year of change and sacrifice balanced with the enjoyment of life’s small pleasures.  It helps to have someone like Julia who can see the forest through the trees.  She has been working tirelessly alongside me.  Even during the 60 hours it took me to strip the paint from the port topsides,  she was there at the end of the day with a couple of cold beers that we would drink at the Sunset Lounge, our two lawn chairs in the shade of Reverie.  Here’s to everyone having an eventful and  productive 2016.  Cheers!


2 Comments

Time Is of the Essence


October is upon us and the race against the elements rages on.  My fit of optimism that predicted the scraping, sanding and oiling of the topsides was, of course just that: optimism.  In my dream world, it was going to take 20-25 hours per side to finish this project.  Now, my optimistic estimate is for each side to be completed in 50 hours per side.  Yes, it’s boat work and that’s how it goes.  The real time consumer has been cleaning out all the fastener holes.  They are filled with hardened putty and require a bit of concentrated heat to soften up then carefully dig out.   I want to get each one as clean as possible to facilitate the penetration of the 50/50 mixture of 100% pure tung oil and turpentine.  Any place there is exposed end grain needs to be soaked in this formula.  This mixture gets heated to near boiling and soaks into the wood quite well.

There are many hundreds of fastener holes and, depending on each ones depth, take a minute or so apiece to clean. The strength of a wooden boat lies in redundancy.  Many small fasteners and components are put together to effect the strength required to withstand the stresses incurred in a seaway.  The stress gets distributed across the greatest area possible and, voila,  you have a sturdy wooden boat.  You also have hundreds of fasteners that demand attention.  It only takes the failure of a few in a series to set off a chain reaction that could lead to catastrophe.

During this phase of paint scraping, I also had to determine the best way to preserve the waterline.  The waterline was already there so, to lose it then have to set up the procedure to draw a new waterline seemed to be the kind of redundancy we should like to avoid. Preserving the existing waterline is one of the reasons I chose to do the topsides first and address the hull below the waterline as a separate project; that, and the fact that the bottom paint has no bare spots and, therefore, is still protecting the wood.  It’s those bare spots on the topsides that initiated this phase of the restoration.

The waterline runs from the bow in a 3 inch strip and expands to 4 inches over the last few feet near the stern.  Easy enough.  I can mark where that begins and add that taper.  I was going to tape along the bottom of the waterline and work from that but the blue painters tape that was already there wasn’t holding up to the heat gun.  I chose to sharpen the scraper to a knife edge and work along the boot top (waterline)/bottom seam in an upward fashion so as to preserve the waterline.   You can see in the photo, where I have the waterline removed, that it worked well and there will be an accurate line to follow when it’s time to paint the new waterline.

As the sanding progresses, the hull is revealing itself in a very positive way.  It is nice to see the yellow pine exposed for the first time in over 60 years looking as if it had just been fastened.  It has withstood the test of time admirably and is a testament to it’s efficacy as a planking material.  I have a shop vac rigged up to the discharge of the sander and it is working quite well at keeping the dust down.  With this system, it is virtually dust free.  I’m still wearing a dust mask and ear protection but it is much more comfortable than the dreaded respirator.

We took a break from the topside project to begin construction of a better tarp frame.    With Winter coming on, the frame needed a steep pitch to deflect the incessant lake effect snows that dump on the shoreline of Lake Michigan. The frame will be reinforced with more rafters as the season progresses but, for now,  it’s enough to withstand the wind and rain. We had a makeshift setup last Winter and had quite a time getting the snow and ice dams off the deck.  This new structure will also serve as a beam to lift the cabin off the boat.  Julia is working on getting all the fasteners out of the cabin and cockpit (a whole lot of work in one small sentence).   Then, we will lift the cabin top off with a block & tackle and get it off the deck in order to have better access to the deck beam and carline repairs.  It will also make it easier to strip the inside of the coach roof and cabin sides as it can then be flipped upside down rather than us being showered by scraped varnish.

There is a bit of momentum and the only unknown factor is the weather.  If it all doesn’t get done before the snow flies, that’s the way it goes.  In the mean time, onward we plunge; led by an optimism that suggests a certain naivety while providing impetus to move along with this tedious, dirty job of stripping, sanding and oiling the topsides.

DSCN1228DSCN1229IMG_3002DSCN1232DSCN1227DSCN1224DSCN1223DSCN1222DSCN1220