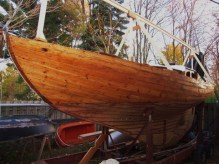

March has arrived and the time change to Daylight Savings takes place in the early hours of Sunday morning. Losing an hour of sleep shouldn’t be much of a problem seeing as I get up well before dawn anyway. We have passed meteorologic Spring already and the month brings with it the sense that I need to finish up with this Winter’s off-site projects.
The blocks on Reverie were in desperate need of TLC. The varnish on all of them was chipped and worn with the sheet blocks showing the worst of it. They had been left on the boat for who knows how long, and had deep splits in the wooden cheeks with black water stains that looked permanent.
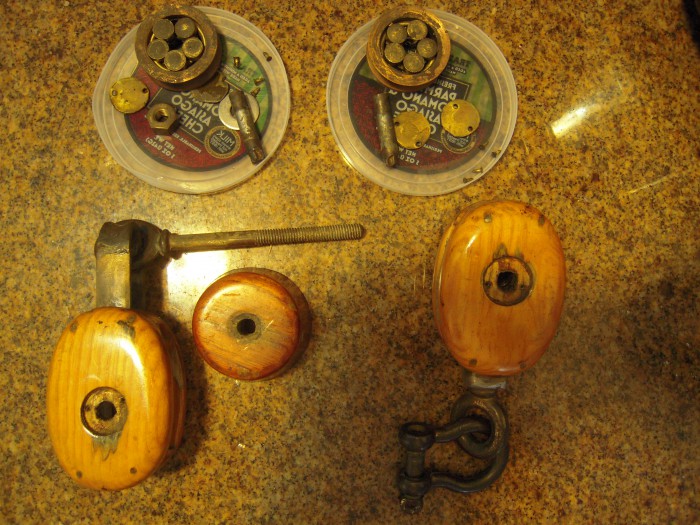
Blocks, their sheaves, bronze roller bearings and cheek plates.

Some of the blocks as we found them. The lorn sheet blocks are on right.

Smart Strip does the job.
The first course of action was to disassemble everything and strip the cheeks down to bare wood so they could go into a hot bath of linseed oil, beeswax and turpentine. I discovered SmartStrip when I was working on Persistence and needed to strip paint from fiberglass. It is expensive, costing close to $60.00 a gallon but it is environmentally friendly and does the job. It’s biodegradeable and has very little odor. We have had good results covering whatever needs to be stripped with plastic bags or plastic food wrap and leaving it on overnight. It will be the stripper of choice for the rest of Reverie’s projects along with a heat gun for the hull and other easily accessible areas.
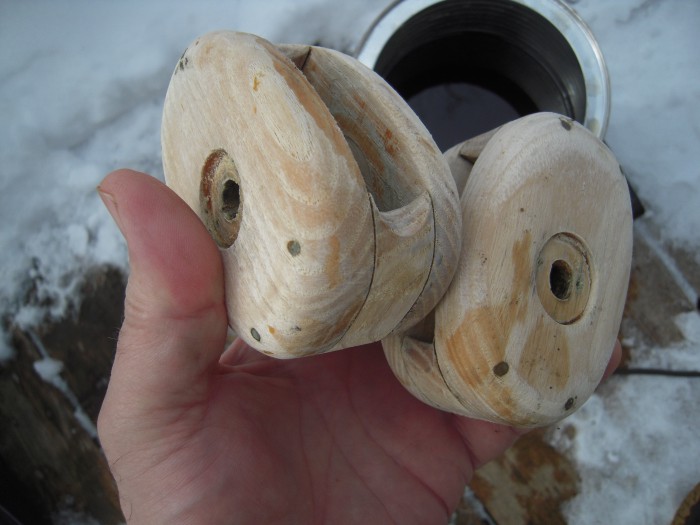
A couple of block cheeks stripped and ready to go into the hot linseed oil mixture.
I applied the SmartStrip to the wooden cheeks and let them sit overnight in plastic grocery bags. The next morning, I scraped off the varnish with a plastic putty knife and an old toothbrush. I brushed household bleach on the black spots repeating this procedure until the spots were all but gone. I then scrubbed them under running water so as to remove all traces of paint stripper and bleach. Before they went into the oil mixture, I let them air dry for several days.
Getting the mixture of linseed oil, beeswax and turpentine at the right temperature takes careful monitoring of the hot plate. I like to have it as hot as possible without smoking and potentially catching on fire.
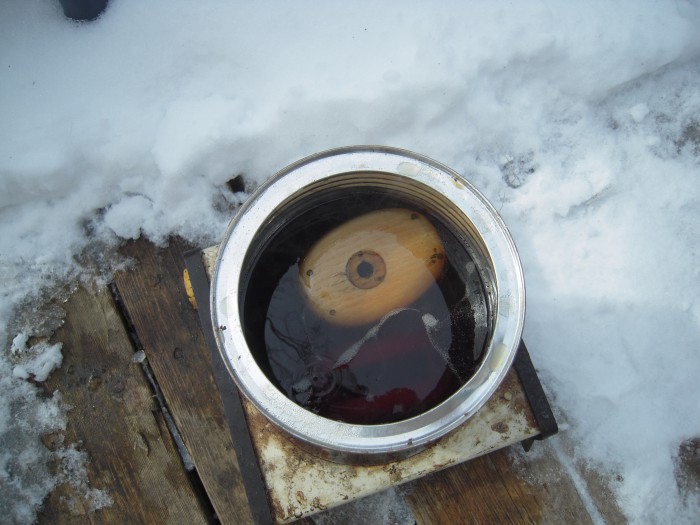
Well used hot plate and coffee can full of linseed oil, beeswax and turpentine.
I cooked each block for about 4 hours until I could see no more air bubbles coming out of the wood. I then let them sit for a while on a piece of cardboard and really didn’t have to wipe any excess off except where they touched the cardboard. I use boiled linseed oil, a bit of beeswax and turpentine to help the mixture penetrate deep into the wood. Boiled linseed oil dries faster than raw linseed oil but still, these cheeks are going to hang for a few months before I lightly sand them and finish them with spar varnish. The splits in the sheet block cheeks completely closed up after their soaking and one has to look hard to see them. They’ll be fine.
So, that’s one more project off the list and a million more to go. Regardless, it feels good to know it’s done and I don’t have to think about it any more. That calls for a wee dram of Scotch!
Cheers,
Roger

June 8, 2015 at 8:07 am
Hi Roger, my project Flamingo came with blocks in a very poor state so I think I’ll be trying out your restoration method. Could you share your recipe of Oil, Turps and Beeswax?
Having read your post about scraping snow off Reverie I’m going to stop complaining about a bit of rain water pooling on my tarp! 🙂 Battling against the ravages of time and decay on a wooden boat is hard enough with throwing in a battle against the elements too!
Jonnie
LikeLiked by 1 person
June 12, 2015 at 12:27 pm
Hi Jonnie, yes, it certainly is a struggle against the elements with these old wooden boats! I’m looking forward to that turning point when Reverie’s able to withstand the elements on her own. For now, it’s tarp and pooling for us… Next Winter, I hope to find a suitable barn or large shed to stash her in so as not to be shoveling snow off the deck!
The recipe I use for the oil soak is roughly 3 parts oil, 2 parts turpentine, 1 part beeswax. I bump up the beeswax if it’s going to be a stand alone oil finish. I put it in an old coffee can which I find is easier than the old pans I used to use since you can put the lid on it and reuse it later by adding more turps. I have a dedicated hot plate that I set far away from any structure and slowly bring it to temperature. I let it get hot enough to agitate the mixture. The trick is to get it at a constant temperature as it will be soaking for hours. The blocks will bubble for quite some time as the air is replaced by oil, 4 hours minimum. With a good soak like that, they’ll need some time to dry out before finishing. That’s one of the reasons I tackled this project first. I’ve used linseed oil for years but feel 100% tung oil is the way to go. It’s certainly more expensive but doesn’t attract mold like linseed oil can. I’ve only had problems with mold on the plain oil finish and maybe more beeswax int the recipe would have remedied that but it was a mess. That only happened once but that was enough!
LikeLike